
You don’t have to be a designer. We’ll help you turn your favorite memories into a quilt you’ll treasure.
Creating a photo quilt is one of the most meaningful ways to preserve your family’s memories and turn your favorite photographs into a beautiful keepsake. Whether you’re making a memory quilt to celebrate a wedding, honor a loved one, remember a special vacation, or create a one-of-a-kind gift, this step-by-step guide will walk you through the entire process. You’ll learn the six basic steps of how to make a photo memory quilt: how to choose the best photos, select the right quilt pattern, decide whether to make the quilt yourself or hire a local quilter, order custom Photo Quilt Blocks, assemble and finish your quilt, and care for your finished heirloom. No matter your quilting experience, you’ll find everything you need to confidently create a photo quilt that tells your unique story and will be treasured for generations.
Step 1: Gather the Photos That Tell Your Story
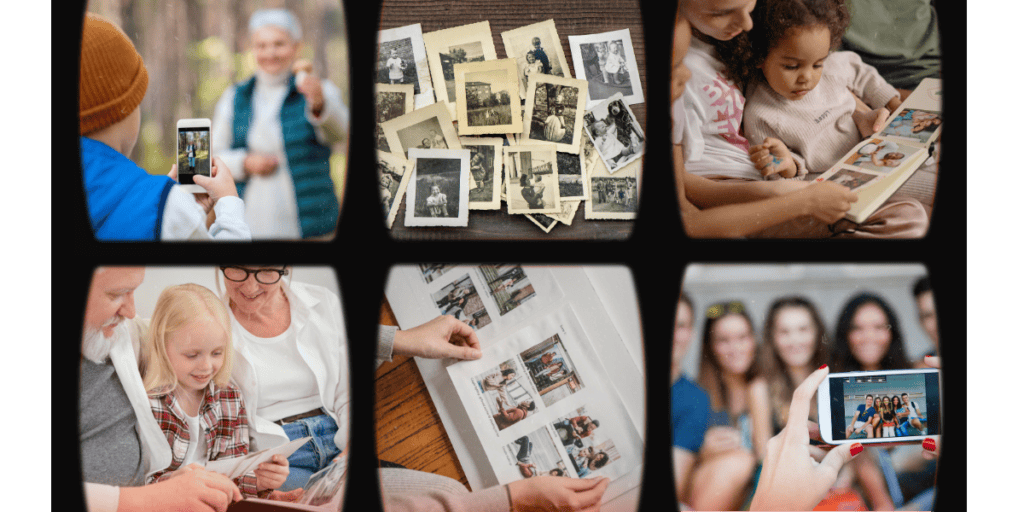
Every great photo quilt starts with one simple step—choosing the memories you want to preserve.
Don’t worry about having everything perfectly organized. Just start gathering the photos that make you smile, bring back special memories, or remind you of the people you love. Whether you’re creating a memory quilt, graduation quilt, wedding quilt, or family keepsake, these photos are what will make your quilt truly one of a kind.
Where Can You Find Your Photos?
Your favorite pictures may be scattered in several places. Here are some of the most common sources:
- 📱 Photos on your phone
- 💻 Pictures stored on your computer
- 📷 Old printed photographs and photo albums
- 🌐 Social media accounts like Facebook or Instagram
- ☁️ Cloud storage such as Google Photos, iCloud, or Dropbox
- 👨👩👧👦 Family and friends who may have photos you don’t
Don’t be afraid to ask siblings, cousins, or friends if they have pictures you’ve never seen. Often, they have treasured memories that become some of the most meaningful blocks in the quilt.
Don’t Stress About Photo Quality
Many customers worry that their photos aren’t “good enough.” That’s completely normal.
As we review your order, we’ll keep an eye out for photos that may not print well because they’re blurry, too small, or low quality. If we notice a photo that could be a problem, we’ll let you know before printing whenever possible. Sometimes you only have one photo and it isn’t the best quality. That is ok! It is your memory and some version of that memory is better than none.
We know you’re creating more than just a quilt—you’re preserving memories that can’t be replaced. We want you to love every block and feel confident that your finished quilt will become a treasured family keepsake for years to come.
Helpful Articles
📷 How to Choose Photos for a Memory Quilt
Start here if you’re not sure which photos will tell your story best.
🖼️ How to Turn Old Paper Photos into Digital Photos
Learn the best way to scan or photograph old family pictures so they print beautifully on fabric.
📱 Will Photos From My Phone Print Clearly?
Find out what image size you need and how to know if your photo is large enough.
✨ Why Your Photo Quilt Looks Blurry (and How to Fix It)
Avoid the most common mistakes that cause blurry or low-quality photo quilt blocks.
🧵 Photo Quilt Blocks FAQ
Answers to common questions about ordering, photo quality, fabric, and printing.

Step 2: Choose a Quilt Pattern
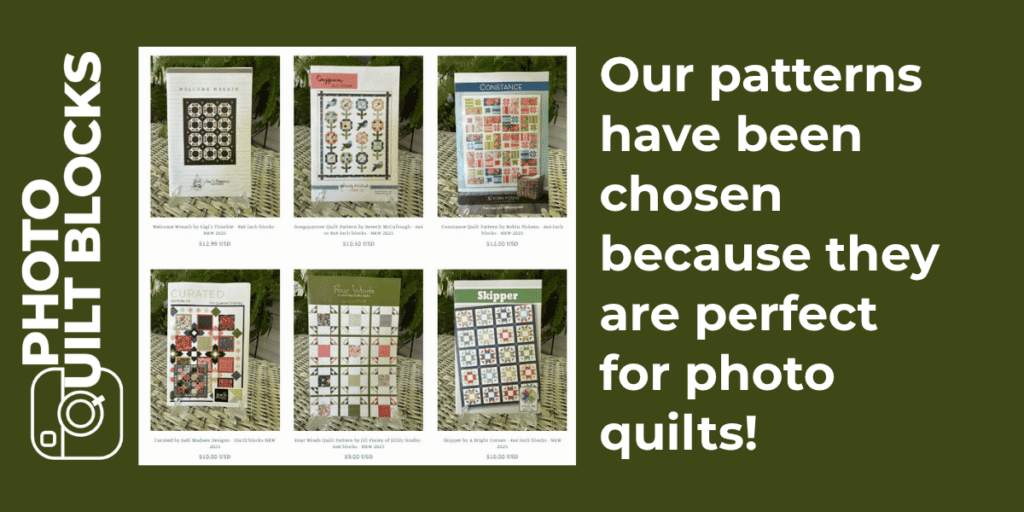
Now that you’ve gathered your photos, it’s time to choose a quilt pattern that fits your style and skill level.
If this is your first photo quilt, don’t overthink it! Some of the most beautiful memory quilts are made with simple layouts that let the photos become the star of the quilt.
Beginner-Friendly Patterns
If you’re new to quilting, consider one of these easy options:
- Simple Squares – Sew your photo blocks together in rows for a clean, timeless design.
- Squares with Sashing – Add strips of coordinating fabric between your photo blocks to frame each picture and make the quilt easier to assemble.
- Simple Borders – A border around the outside of your quilt adds a finished look and helps showcase your memories.
Looking for Something More Creative?
If you’d like a more unique design, we’ve done the hard work for you! Our curated collection of photo quilt patterns has been selected because they beautifully showcase your photos instead of cutting them apart or hiding them in busy piecing.
Each pattern tells you:
- What size photo blocks you’ll need
- How many photo blocks are required
- The finished quilt size
- The skill level
- Fabric requirements
Browse our collection of Photo Quilt Patterns to find the perfect design for your keepsake quilt.
Helpful Articles
Photo Memory Quilt for a Beginner
https://photoquiltblocks.com/photo-memory-quilt-for-a-beginner-photo-quilt-blocks/
Where Do I Get Photo Memory Quilt Patterns?
https://photoquiltblocks.com/where-do-i-get-photo-memory-quilt-patterns-2/
14 Amazing Photo Quilt Patterns for Memory Quilts
https://photoquiltblocks.com/14-amazing-photo-quilt-patterns-for-memory-quilts/
6 Photo Quilt Layout Ideas That Always Look Beautiful
https://photoquiltblocks.com/6-photo-quilt-layout-ideas-that-always-look-beautiful/
Best Photo Layout Ideas for Memory Quilts With Lots of Photos
https://photoquiltblocks.com/best-photo-layout-ideas-for-memory-quilts-with-lots-of-photos/
Step 3: Decide Who Will Make Your Quilt
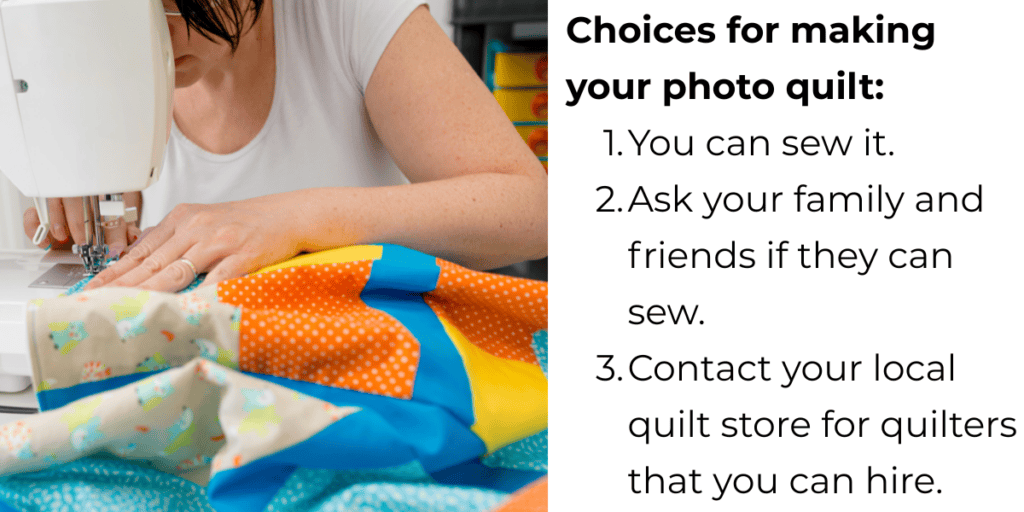
One of the biggest misconceptions about photo quilts is that you have to make the entire quilt yourself.
The good news is—you don’t!
Whether you’re an experienced quilter or have never sewn a stitch, there are several ways to turn your printed photo blocks into a beautiful keepsake.
Option 1: Make the Quilt Yourself
If you enjoy quilting, this is a wonderful project to create at your own pace. Once you receive your printed photo blocks, simply follow your chosen pattern and sew the quilt together just like you would any other quilt.
Many beginners successfully make a photo quilt as their very first quilt!
Option 2: Ask a Friend or Family Member
Do you know someone who loves to quilt? Many families work together on memory quilts. You provide the photos and memories, and they provide the quilting skills. It can become a meaningful project that everyone shares.
Option 3: Hire a Local Quilter
If you don’t sew, don’t let that stop you from creating a beautiful memory quilt.
Many local quilt shops offer quilt-making services or can recommend experienced quilters in your area. You can also find longarm quilters who will finish your quilt after the quilt top has been pieced together.
This is a great option if you want a professionally made quilt without having to learn how to sew.
✨ Don’t know a quilter?
Ask your local quilt shop! Most quilt shops know experienced quilters in their area who can piece your quilt or finish it on a longarm machine. Even if you don’t sew, you can still create a beautiful heirloom using your Photo Quilt Blocks.
We Make the Photo Blocks—You Choose the Rest
At Photo Quilt Blocks, we specialize in printing your favorite photos on high-quality fabric. We carefully print each image so it’s ready to be sewn into your quilt.
Whether you decide to make the quilt yourself, ask a friend for help, or hire a local quilter, you’ll receive beautiful photo blocks that are ready for your project.
The most important thing is preserving your memories—not who stitches the quilt together.
Helpful Articles
How to Design a Photo Quilt You’ll Love
https://photoquiltblocks.com/best-photo-layout-ideas-for-memory-quilts-with-lots-of-photos/
How to Make a Photo Quilt for Beginners
https://photoquiltblocks.com/photo-memory-quilt-for-a-beginner-photo-quilt-blocks/
The Best Quilt Patterns for Photo Quilts
https://photoquiltblocks.com/14-amazing-photo-quilt-patterns-for-memory-quilts/
Step 4: Order Your Photo Quilt Blocks
Now for the fun part—bringing your memories to life!
We designed our ordering process with quilters in mind, so you don’t have to worry about complicated measurements, resizing photos, or doing any math.
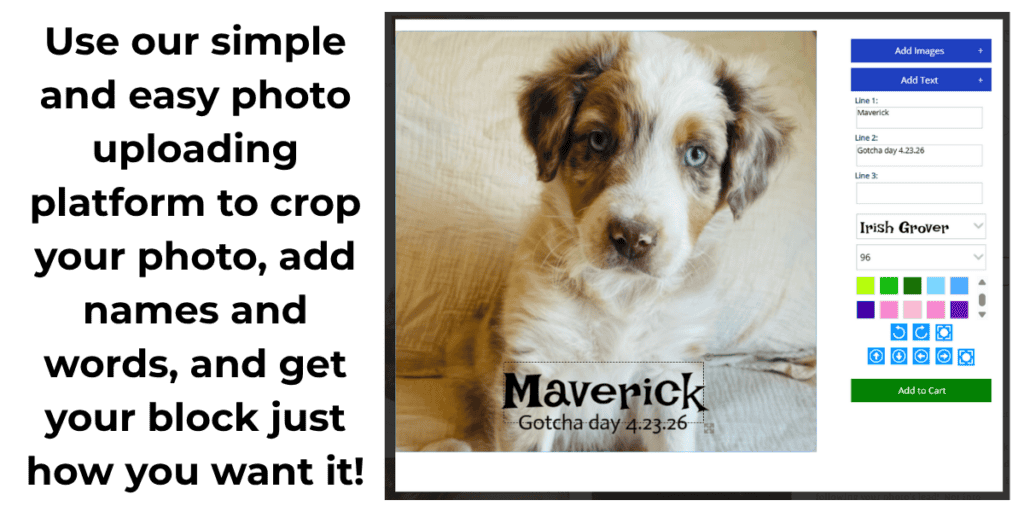
Our easy-to-use online designer lets you:
- Upload your photos in just a few clicks
- Automatically sizes each photo to the size block you have chosen (all sizes listed are FINISHED SIZES)
- Crop and reposition your image until it’s just right
- Add names, dates, or meaningful words
- Rotate your photos if needed
- Include the proper ¼-inch seam allowances so your blocks fit perfectly into your quilt
No special software. No design experience. No complicated calculations.
Just upload your favorite photos, personalize your blocks, and we’ll take care of the printing.
In just a few minutes, you’ll have your custom Photo Quilt Blocks ordered and on their way to becoming a treasured keepsake.
Helpful Tutorials
How to Create a Single Photo Quilt Block (Step-by-Step Video Tutorial)
Learn how to upload, crop, resize, rotate, and add text to your photo before ordering.
https://photoquiltblocks.com/how-to-create-a-single-photo-memory-quilt-block-square-photo-quilt-blocks/
Photo Quilt Blocks FAQ: Everything You Need to Know Before Ordering
Answers to the most common questions about ordering, sizing, seam allowances, shipping, and what to expect.
https://photoquiltblocks.com/photo-quilt-blocks-faq-everything-you-need-to-know-before-ordering/
Printing Photos on Fabric – Fat Quarter Layouts
Learn when ordering a fat quarter full of photos is the best option and what happens after you place your order.
https://photoquiltblocks.com/fat-quarter-photo-quilt-block-layout-when-why-to-choose-this-option/
Common Questions About Photo Quilt Blocks
Find answers about fabrics, washing, care instructions, and learn where to watch additional tutorial videos.
https://photoquiltblocks.com/common-questions/
Step 5: Sew Your Photo Quilt Together
Congratulations! Your Photo Quilt Blocks have arrived, and now it’s time to transform them into a beautiful keepsake.
The great news is that your photo blocks sew just like any other quilt block. Simply follow your chosen pattern and enjoy watching your memories come together, one stitch at a time. If you have chosen to hire a local quilter, it is time to deliver your photos to her/him to work their magic!
Before You Start Sewing
A few simple tips will help you get the best results:
- Lay out your photo blocks before sewing to make sure you’re happy with the arrangement.
- Double-check that all of your photos are facing the correct direction.
- Press your fabrics and photo blocks as needed before assembling your quilt.
- Use a ¼-inch seam allowance, just as you would with any quilting project.
- Take your time! This isn’t just another quilt—it’s a collection of memories.
Don’t Forget the Finishing Touches
Once your quilt top is complete, you can:
- Add borders to make your quilt larger.
- Include sashing to frame each photo.
- Add cornerstones or pieced blocks for extra color and interest.
- Personalize your quilt with an embroidered label that includes names, dates, or a special message.
Then It’s Ready for Quilting
After your quilt top is finished, layer it with batting and backing fabric. You can quilt it yourself on your home sewing machine or have a local longarm quilter professionally finish it.
Finally, bind the edges, give it one last press, and enjoy a keepsake that tells your family’s story for generations.
Helpful Articles
🧵 Quilting a Photo Quilt – A Mini Tutorial
Learn about quilting methods, whether to quilt over your photos, thread choices, batting, and quilting designs.
https://photoquiltblocks.com/quilting-a-photo-quilt-a-mini-tutorial/
🖼️ Should You Quilt Over Your Photos?
This topic is covered in the article above. It explains the advantages of quilting directly on your photo blocks, quilting around them, stitch-in-the-ditch, frame quilting, and edge-to-edge quilting.
https://photoquiltblocks.com/quilting-a-photo-quilt-a-mini-tutorial/
🧺 Can You Wash a Quilt With Photos On It?
Learn how to safely wash and care for your finished photo quilt so it can be enjoyed for years to come.
https://photoquiltblocks.com/can-you-wash-a-photo-quilt/
🏷️ How to Make a Photo Quilt – Binding the Quilt
The final section of this article shows you how to bind your quilt and explains what information to include on a quilt label.
https://photoquiltblocks.com/how-to-make-a-photo-quilt-binding-the-quilt/
☁️ What Quilt Batting Should I Use for My Photo Quilt?
Discover how to choose the best batting based on loft, fiber content, warmth, and the maximum quilting distance for your design.
https://photoquiltblocks.com/what-quilt-batting-should-i-use-for-my-photo-quilt/
Step 6: Share Your Story
Congratulations—you did it!
Your photo quilt is more than just fabric and thread. It’s a collection of memories, milestones, and the people you love, all stitched together into a keepsake that can be treasured for generations.
Now it’s time to enjoy your finished quilt and inspire others to create one of their own!
Enjoy Your Quilt
Wrap up in it during family movie nights, display it proudly in your home, or give it as a heartfelt gift. However you use it, we hope it brings smiles and happy memories every time it’s seen.
Share Your Finished Quilt
We absolutely love seeing the quilts our customers create!
Share a photo of your finished project on Facebook or Instagram and tag Photo Quilt Blocks so we can celebrate your beautiful work with our quilting community.
Your quilt may inspire someone else to preserve their family’s memories, too.
Leave a Google Review
If you enjoyed your experience with Photo Quilt Blocks, we’d be incredibly grateful if you would leave us a Google review.
Your review helps other quilters feel confident about creating their own photo quilts and allows our small business to continue helping families preserve their most treasured memories.
Submit Your Quilt to Our Customer Gallery
We’d love to feature your finished quilt on our website!
Send us a photo of your completed project along with a few sentences about the story behind it. Whether it’s a memory quilt, graduation quilt, wedding quilt, baby quilt, or a gift honoring someone special, your story may encourage another family to begin their own photo quilt journey.
Every quilt has a story. We’d love to hear yours.
Seeing how you’ve transformed your memories into a beautiful quilt is one of the best parts of what we do. Thank you for trusting us with your family’s most treasured moments.
Recent Posts
25th Wedding Anniversary Photo Quilt - Customer Quilt Spotlight
Some quilts tell a story. This one tells an entire adventure. ❤️ When Kathy contacted me about creating Photo Quilt Blocks for a very special quilt, we knew the photos had to be just...
My Daughter’s Senior Photo Quilt | Cascading Border Quilt Pattern
Meet the Picture Quilt - Cascading Borders Photo Quilt Pattern Some quilts are made to keep you warm. Some are made to decorate a room. And then there are the quilts that hold a...