
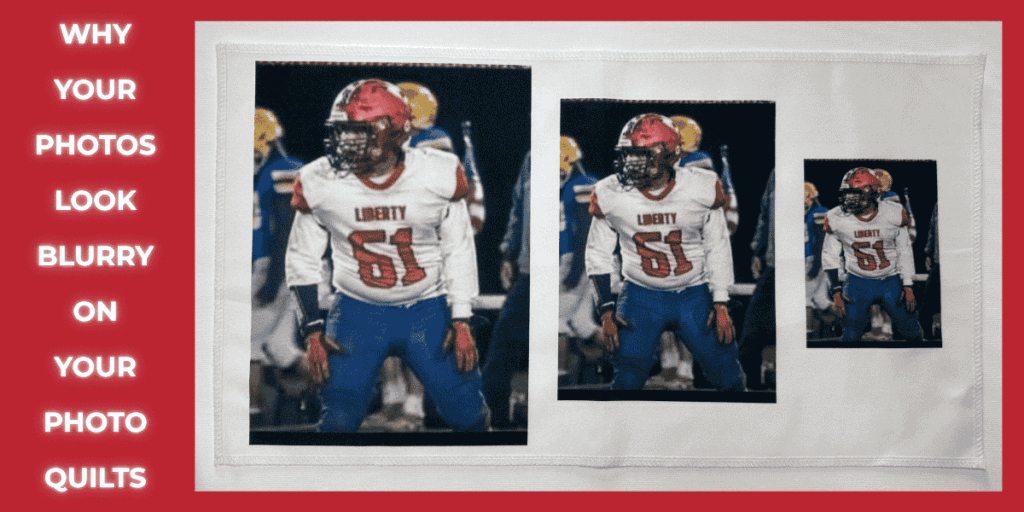
If your photo quilt is turning out blurry, faded, or just not as stunning as you imagined, it’s not bad luck! It is fixable! And honestly, most of the times it comes down to just a few super common mistakes that sneak in before you ever start sewing.
Let’s walk through what’s really going on and how to make sure your photo quilt blocks come out crisp, vibrant, and absolutely worthy of those special memories.
If your photo quilt blocks look blurry, faded, or low-quality, it’s usually caused by low-resolution images, enlarging photos too much, or poor fabric and printing methods. But the fixes are so simple. Start with high-resolution photos (300 dpi), size them correctly for your quilt blocks, choose a high-quality printing method that fuses the ink into the fabric for a crisp, vibrant, washable result. PhotoQuiltBlocks.com prints just such a photo quilt block for you. It is not a DIY system, but they do it for you. Avoid common mistakes like using low resolution photos downloaded from social media and the web, enlarging your photos too much for the size that they are, using low-quality fabric sheets and an ink jet printer (that rub off and don’t wash well), not adjusting the brightness and contract before printing, and you’ll get sharp, clear photo quilt blocks perfect for memory quilts, mini photo quilts, and meaningful DIY photo gifts.

3 Issues That Lead to Blurry or Low-quality Photo Quilt Blocks
1. Low-Resolution Photos
That tiny photo pulled from social media or an old phone? It might look okay on your screen—but once it’s printed on fabric, every little pixel shows up.
Quick tip:
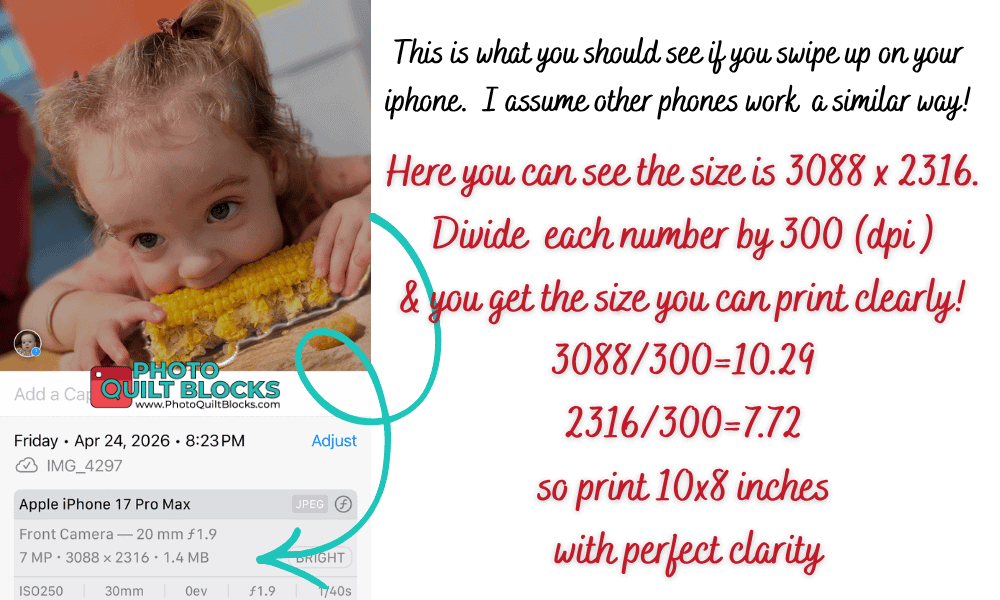
Aim for at least 300 DPI at the size you plan to print. If you’re making an 8” quilt block, your image should be around 2400 x 2400 pixels.
Do you know how to see what size your photo is on your phone?
Here’s how:
- Go to your photos on your phone
- Choose a photo
- Swipe up on the photo
- Here is what you should see
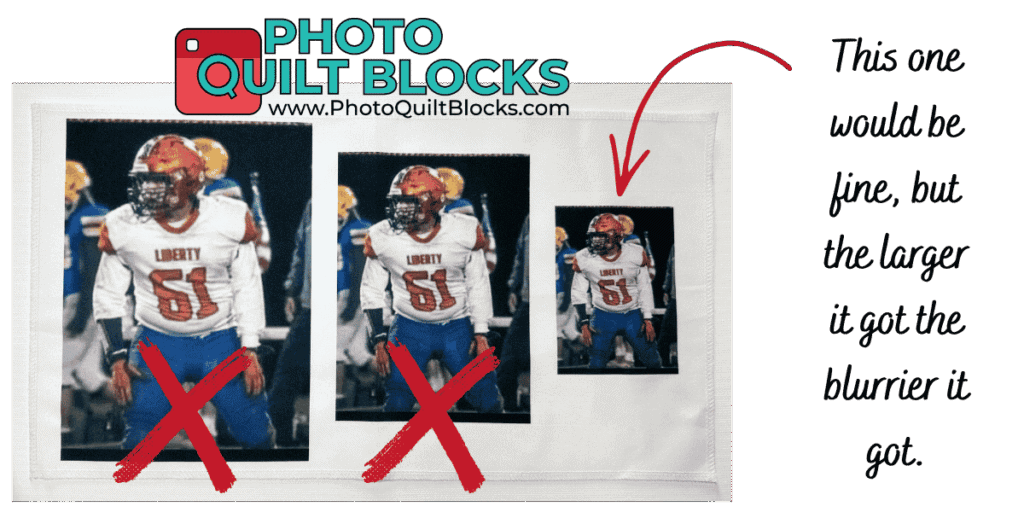
2. Enlarging Photos Too Much
Stretching a small image to fit a larger quilt block is one of the fastest ways to lose clarity. The bigger you go, the more the image breaks down.
Think of it like zooming in too far on your phone—you start seeing blur instead of detail.
3. Poor Printing Methods
Not all fabric printing is created equal—and this is a BIG one.
Most home printing methods are printing fabric from an inkjet printer. Time is proving that this method will yield these results:
- Home inkjet printing can look dull or bleed
- Transfer papers can crack or fade
- This method sits on top of the fabric instead of bonding with it, causing it to rub off, wash off, crack, and fade
That’s why your quilt might look great at first… and then lose quality fast.
How to Fix Blurry Photo Quilt Blocks
Good news—you can totally avoid all of this with a few smart steps.
✔️ Start with High-Quality Photos
Use original images whenever possible (not screenshots or downloads from Facebook). If it matters to you, it deserves a high-quality file.
Phone photos work very well when printing. Most phones today have a high resolution and can be enlarged to 18×23 with no issues for printing with PhotoQuiltBlocks.com.
✔️ Size Your Images Correctly
Before printing, match your image size to your quilt block size. No stretching, no guessing. If you’re unsure, it’s better to crop than enlarge.
Take a look at this video of Photo Quilt Blocks and how the image is cropped to size for you!
Photo Quilt Blocks has created a website just for quilters. You choose the finished size and upload your photo to the website. The website with crop it to size, let you adjust sizing and cropping, add words, and add the 1/4 inch seam allowances for you. Boom. You’re done.
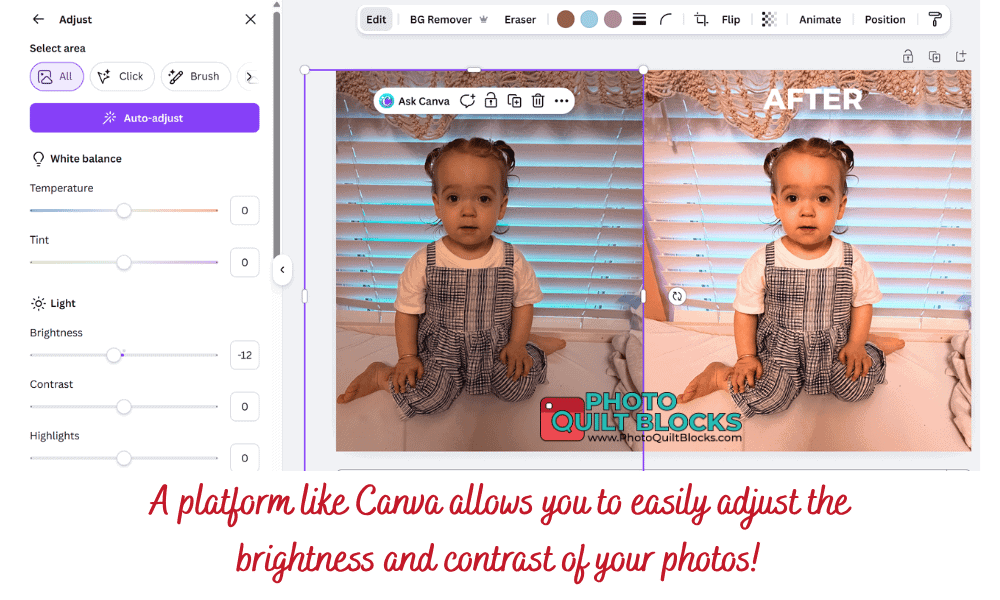
✔️ Adjust Brightness and Contrast
Fabric absorbs ink differently than paper, which can make images look darker or muted.
A quick edit to:
- brighten slightly
- boost contrast
can make a HUGE difference in your final quilt.
Try a website like Canva for easy adjusting of your photos. If computers aren’t your thing, Photo Quilt Blocks now offers a photo editing service. Just message through the chat on the website for more information!
✔️ Choose the Right Printing Method
This is where everything comes together.
For the best results, look for printing that:
- embeds the ink into the fabric (not sitting on top)
- is washable and long-lasting
- keeps colors vibrant and details sharp
This is why so many quilters skip DIY printing frustration and go with professionally printed photo quilt blocks—it removes the guesswork and gives you consistent, beautiful results every time.
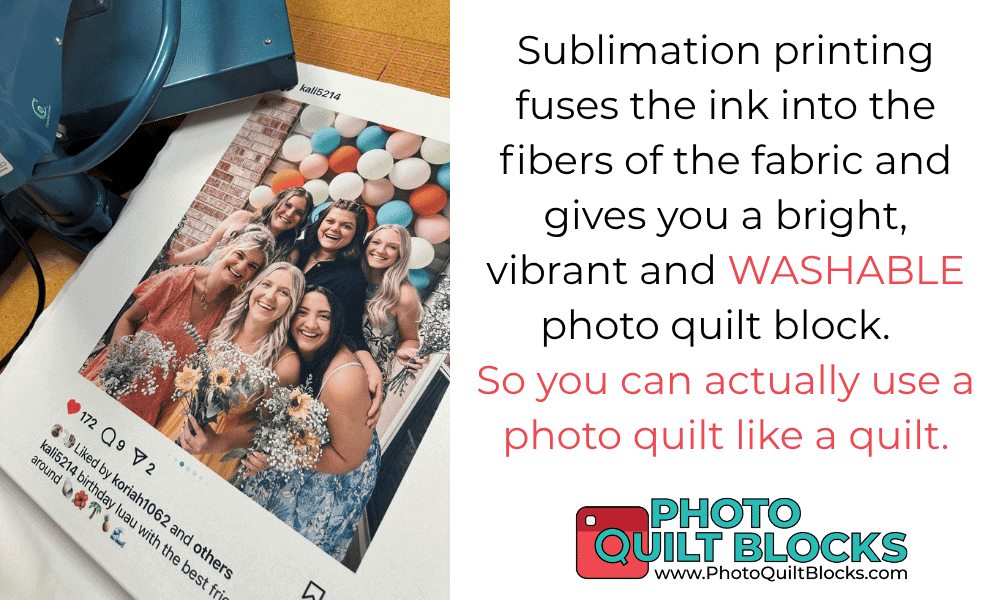
Photo Quilt Blocks has found just the right recipe! Sublimation technology fuses the ink into the fabric and makes it a part of the fabric. It does not sit on top of the fabric and rub off. It is very washable, bright, and durable. After much experimentation, Photo Quilt Blocks has found just the right recipe with their sublimation printing, the perfect poly poplin after much searching and testing, and they even interface the fabric for you as they print, so when it hits your door it is ready to cut and to piece into your quilt. AMAZING!
Common DIY Printing Mistakes to Avoid
- Using cheap or incompatible fabric sheets
- Not mirroring images when required
- Over-saturating ink (leading to bleeding)
- Skipping test prints
- Ignoring fabric grain and texture
These little things add up quickly—and can turn a meaningful memory project into a disappointment.
The Secret to Crisp, Clear Photo Quilts
A truly beautiful photo quilt comes down to three things:
✔️ Clear, high-resolution images
✔️ Proper sizing and prep
✔️ High-quality fabric printing
Get those right, and your quilt won’t just look good—it’ll feel like something you can treasure for years.
Save This Before You Start Your Next Photo Quilt
If you’re planning a photo memory quilt, a mini quilt gift, or a full quilt layout, taking a few extra minutes to prep your images makes all the difference.
Because those photos?
They’re not just decoration—they’re stories.
And they deserve to be printed beautifully. 💛
Happy Quilting (and don’t forget to tell your story!)
Lori
Recent Posts
2026 Quilt Show Schedule: Where to Find Photo Quilt Blocks at Quilt Shows This Year
Quilt show season is one of my favorite times of the year! There’s nothing quite like being surrounded by creative quilters, sewists, embroidery enthusiasts, and fabric lovers who all share a...
Best Photo Layout Ideas for Memory Quilts With Lots of Photos
Looking for the best photo layout ideas for memory quilts with lots of photos? Whether you’re creating a family memory quilt, pet memorial quilt, graduation quilt, or heritage photo quilt, the...