
Meet the Picture Quilt – Cascading Borders Photo Quilt Pattern
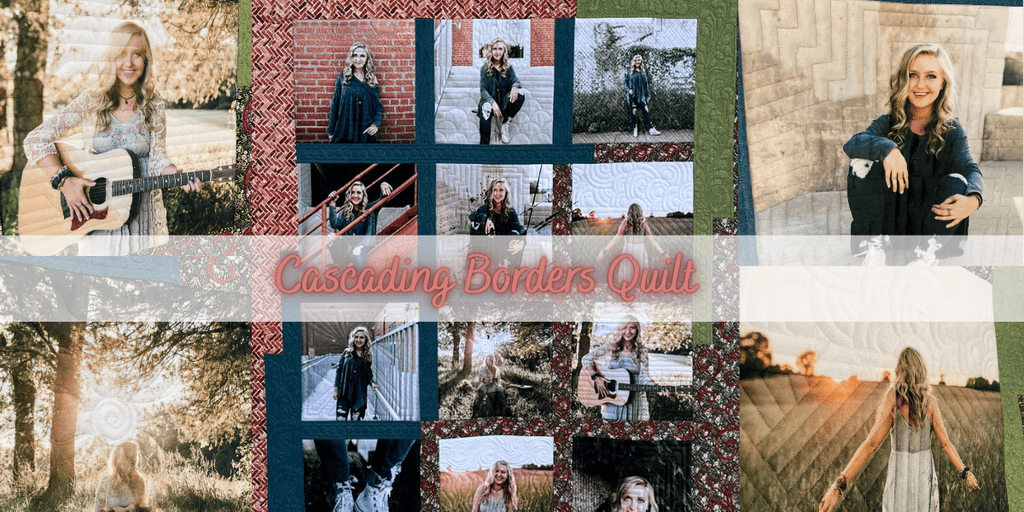
Some quilts are made to keep you warm.
Some are made to decorate a room.
And then there are the quilts that hold a story.
This is one of those quilts.
When my daughter was graduating, I knew I wanted to make her something that would capture this season of her life. I didn’t want it to be just a collection of senior portraits sewn together. I wanted the quilt to feel like her.
So we gathered photographs that showed her personality, her adventures, the places she had been, and the little pieces of life that made these years special.
But as I began looking at the photographs, I saw something else.
I started seeing the quilt inside the photographs.
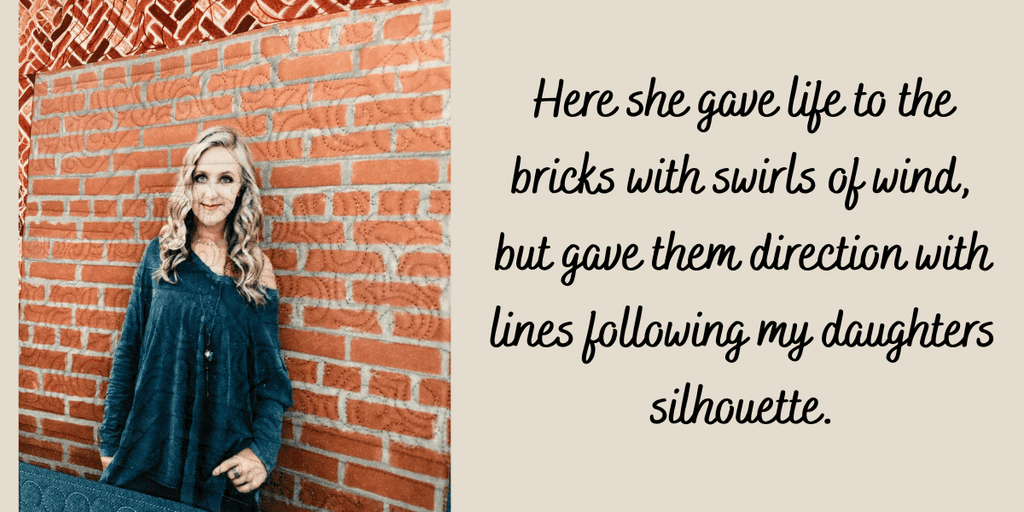
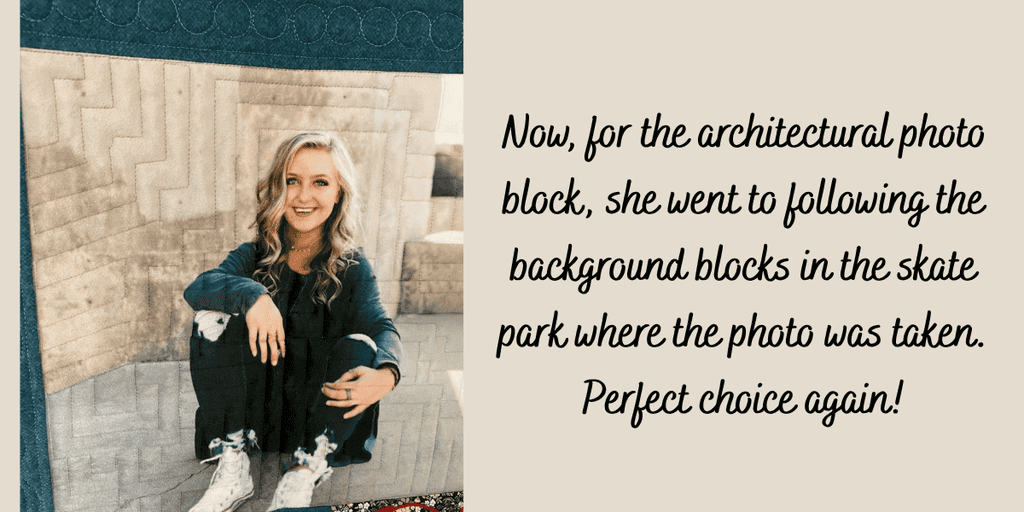
I saw the lines of a brick wall.
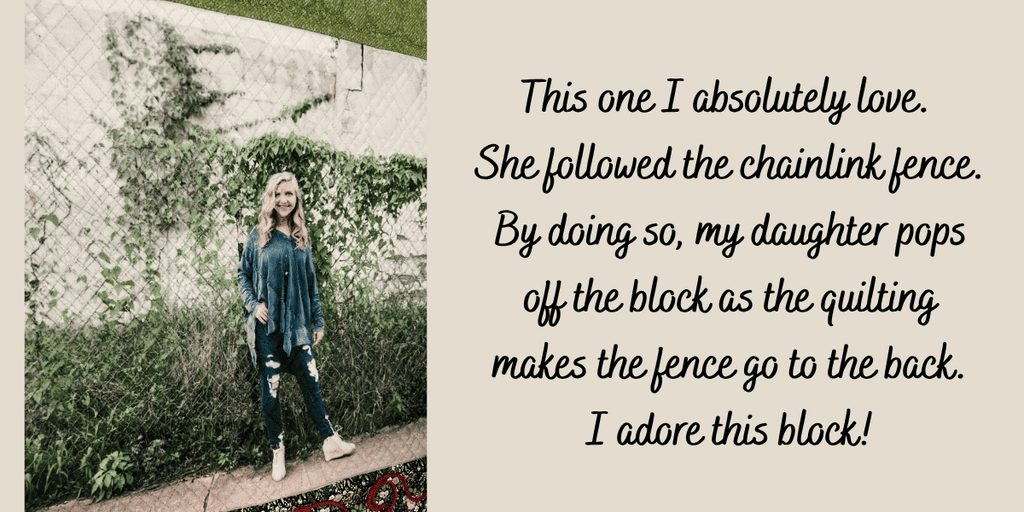
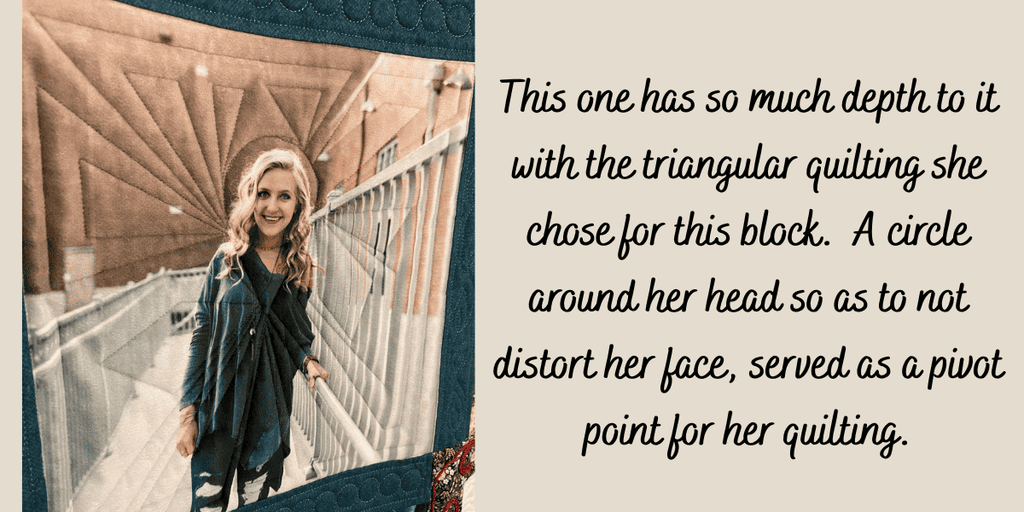
The movement of a fence.
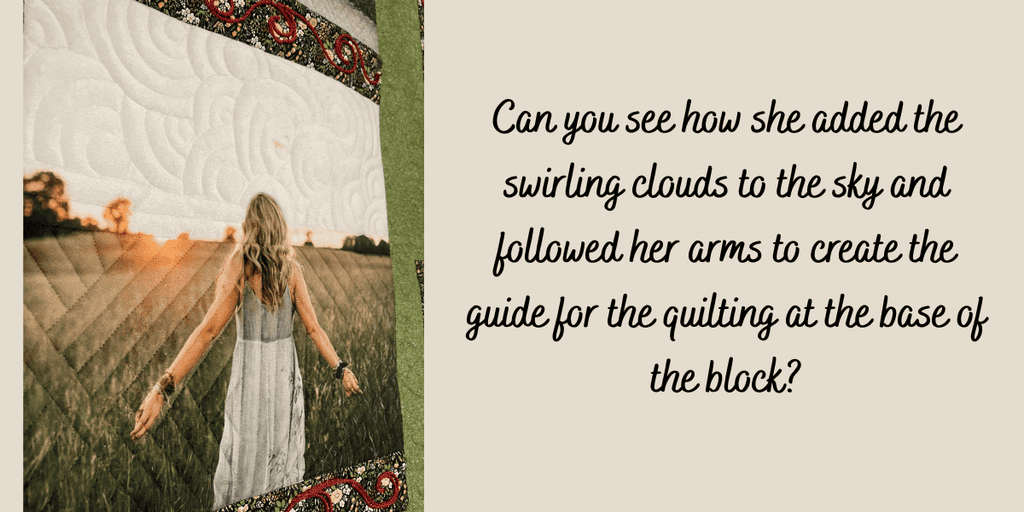
The curves of clouds.
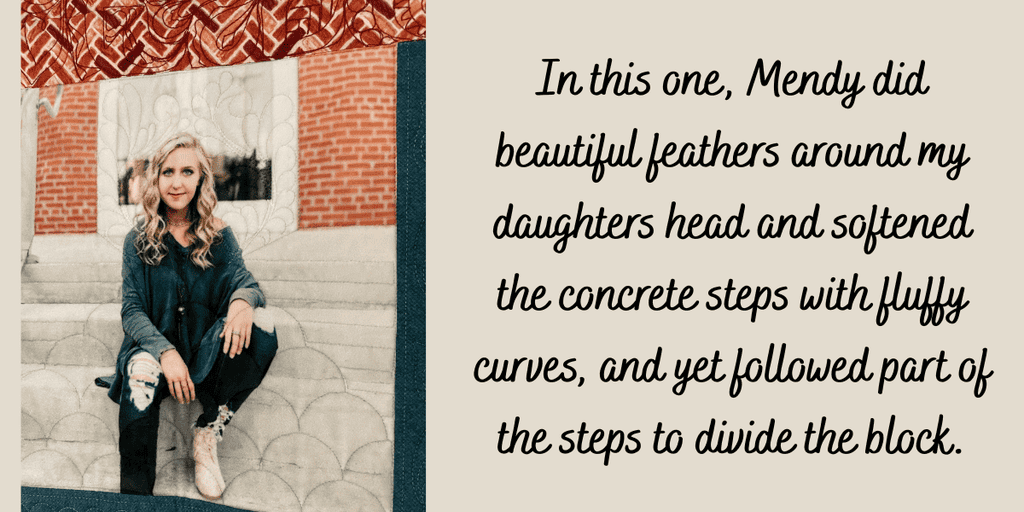
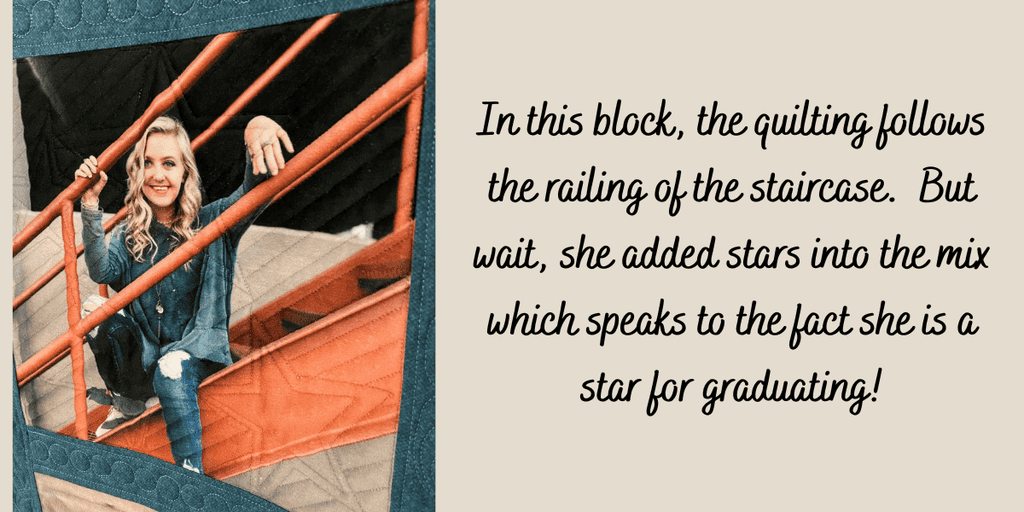
The rails of a staircase.
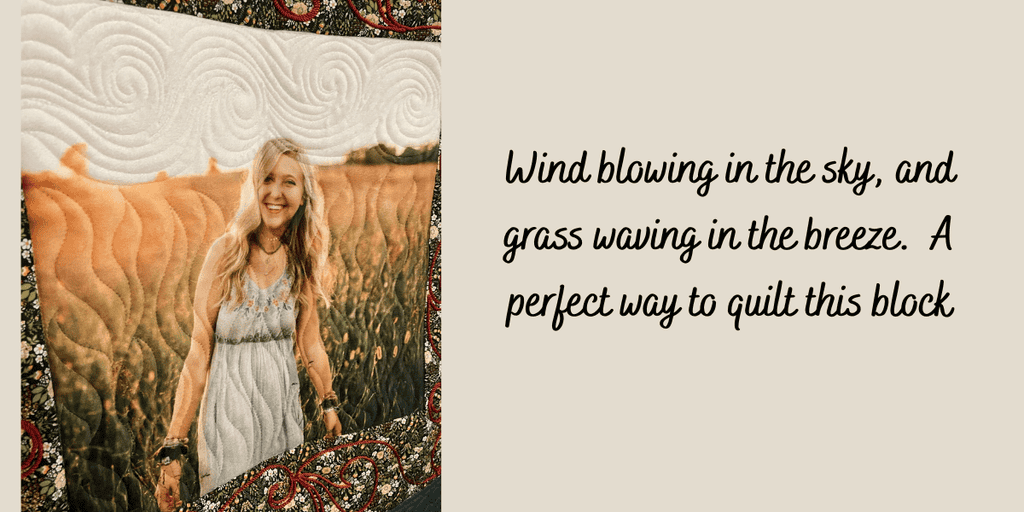
The waves of a field.
And I began imagining how the quilting could follow those elements and actually become part of the photographs.
That idea completely changed the way I approached this quilt.
Instead of simply putting photos into quilt blocks and quilting around them, I wanted the quilting to interact with the photographs—to highlight them, move through them and sometimes even become part of the picture.
The result is this cascading photo quilt, filled with photographs of my daughter and quilting that was designed specifically around each image.
And honestly?
I think the quilting is what brought the photographs to life.
So let me show you how this quilt came together—from choosing the photographs and fabrics to creating the photo quilt blocks, designing the layout, and finally deciding how each photograph would be quilted.
The Pattern – How Cascading Borders Pattern was Born
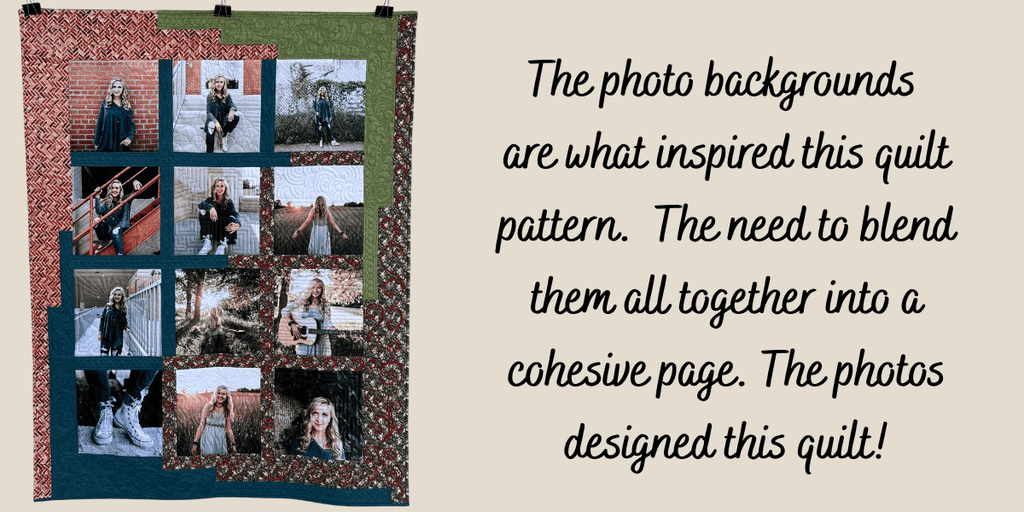
As I was creating my daughter’s senior quilt, I loved the way the photographs could be arranged at different points throughout the quilt and surrounded by coordinating fabric.
That idea became the Cascading Border Quilt pattern.
The design gives you a framework for combining your photo quilt blocks with beautiful coordinating fabrics while allowing each photograph to have its own space. It’s a great way to create a photo quilt that feels more like a traditionally designed quilt rather than simply putting a collection of photographs together.
For this version, I used 12-inch finished photo blocks and 12 photographs. The different fabric borders create movement throughout the quilt and give each photograph room to stand on its own.
And here’s the fun part: you don’t have to make yours look exactly like mine!
Think about what your photographs are telling you. Choose fabrics that pull colors from your pictures. Arrange your photographs in a way that tells your story. And then let your quilting take it one step further.
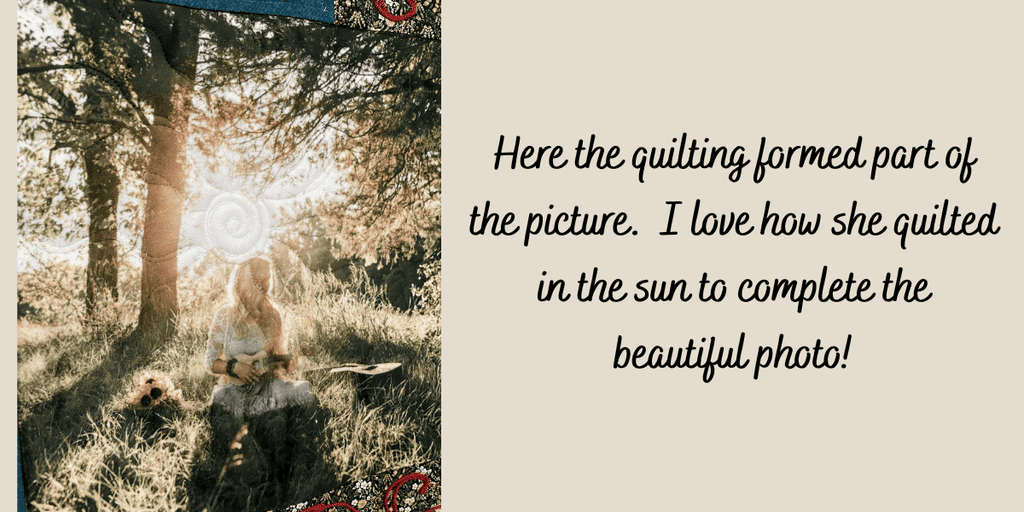
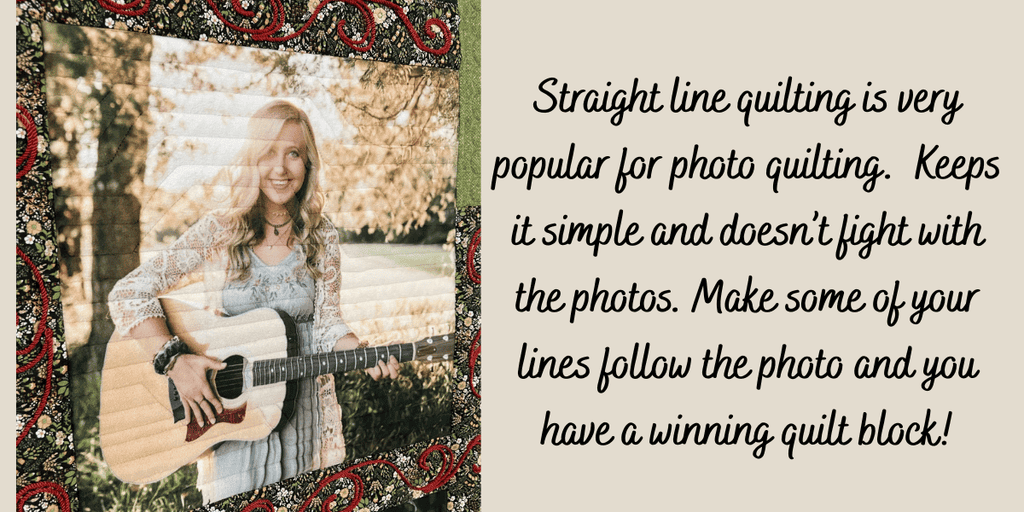
For my daughter’s quilt, the photographs actually inspired the quilting designs. The brick wall, fence, staircase, clouds, field and other background details all became opportunities for Mendy to incorporate the photograph into her quilting.
That is what makes a photo quilt so much fun—you aren’t just following a pattern. You’re creating a quilt around your photographs.
Ready to make your own?
I’ve created the Cascading Border Quilt pattern specifically to work with Photo Quilt Blocks. The pattern calls for 12 finished 12″ photo blocks, so you can choose 12 of your favorite photographs and create your own version of this memory quilt.
Get the Cascading Border Quilt Pattern
And you can order your 12″ Photo Quilt Blocks separately, choosing the fabric option that works for your project. The pattern listing specifically gives you the option of using the 12″ Poly Poplin photo blocks or the 12″ Snuggle Velour blocks.
Order your 12 inch photo blocks here
The pattern gives you the roadmap. Your photographs make it yours.
The Photo Layout – Use the Photos to Move Your Eyes Around the Quilt
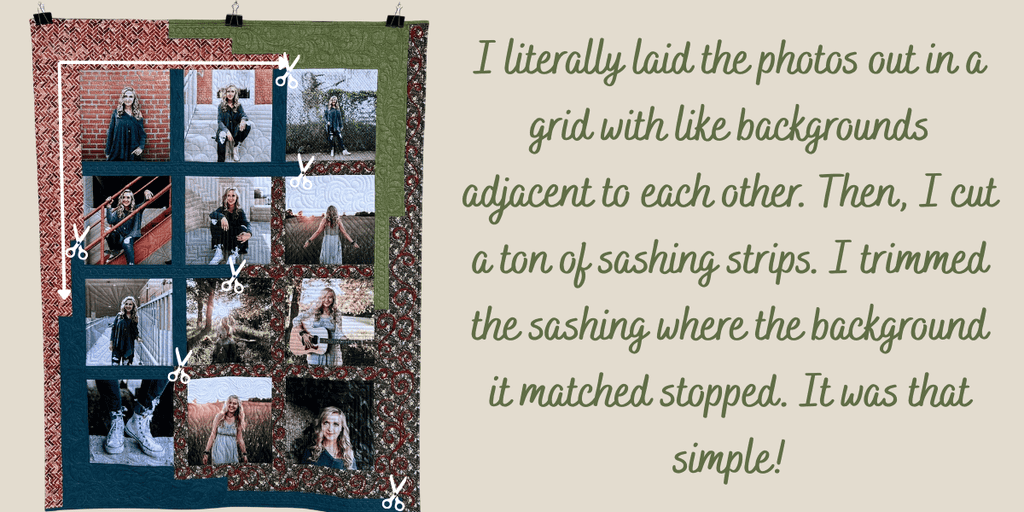
I wanted the photographs in this quilt to feel connected, but I didn’t want them to look like they were simply lined up in rows.
Instead, I played with the photographs until I found an arrangement that allowed the different backgrounds and colors to flow from one photo to the next. The result is a cascading layout, with the photographs surrounded by fabric borders that move across the quilt.
I literally laid the photographs out on a table and started moving them around. I looked at the colors, the backgrounds, the direction my daughter was facing, and how each photograph looked next to the others.
Then I started thinking about the fabric.
I wanted the fabric borders to help connect the photographs while also creating some movement throughout the quilt. Some of the photographs are surrounded by teal, others by the paisley print, and the larger outer borders help pull everything together.
The photographs became the focal points, while the fabric became the framework that connected them.
And that is something I encourage you to do when designing your own photo quilt: don’t be afraid to move your photographs around before you start sewing.
Lay them out. Try different combinations. Put photographs with similar colors together. Separate photographs that are too similar. Look at what happens when one photo’s background visually flows into another.
You may be surprised at how much the arrangement of your photographs can change the entire look of your quilt.
For this quilt, the final arrangement became the Cascading Border Quilt pattern—and it was the perfect way to showcase these twelve photographs.
Choosing the Pictures – Easy but Hard!
Choosing the photos for my daughter’s senior quilt was probably one of the hardest parts—and one of the most fun!
I wanted the quilt to tell the story of who she was at this moment in her life. Rather than choosing a collection of traditional senior portraits, we chose photographs that showed her personality, her interests, and the places and experiences that were important to her.
As I looked through the photos, I also started thinking about the backgrounds in each picture. That became especially important because I knew I wanted the quilting to interact with the photographs.
A brick wall, a fence, the lines of a staircase, the waves of a field, the clouds in the sky—these details became part of the design of the quilt.
That is one of my favorite things about making a photo quilt. The photograph doesn’t have to be the end of the design. It can actually become the inspiration for the quilting.
When choosing photos for a photo quilt, I encourage you to look beyond just the person in the picture. Look at the entire photograph. What is happening in the background? Are there interesting lines, shapes, textures, or movement that could inspire the quilting?
Sometimes the perfect quilt photo isn’t the most traditional photograph. It’s the one that gives your quilter something interesting to work with.
The Fabric Choices
Once I had the photos chosen, it was time to decide what fabrics would bring everything together.
This is where I really wanted the quilt to feel like one cohesive story, rather than simply a collection of photographs surrounded by fabric.
I pulled colors directly from the photographs—deep teal, greens, warm rusts, creams and neutrals—and used those colors throughout the quilt. I ALWAYS have my printed photo fabric with me when choosing fabric. That way my fabric matches my photos perfectly.
I also chose fabrics that reflected the feeling of the photographs. The patterned border fabric added personality and helped tie some of the warmer colors together, while the solid and tone-on-tone fabrics gave the photographs room to stand out.
I love using fabric this way because you don’t necessarily have to find one “perfect” fabric to match everything. Instead, choose a few colors that appear throughout your photographs and build your fabric choices around them.
Let your photos be your color palette!
And don’t be afraid to mix prints. A combination of solids, textures, small prints and larger prints can create a beautiful background for your photo quilt without competing with the photographs themselves.
The Photo Quilt Blocks – We Print The Photo Fabric For You!
This is where Photo Quilt Blocks comes into the picture!
You don’t have to make the photo fabric yourself from scratch. Photo Quilt Blocks is my photo-printing service that prints your photographs directly onto fabric for you. My goal is to take care of the tricky part—the photo printing—so you can spend your time doing the fun part: quilting!
Each photograph is prepared for the size you need, and you can crop and edit your photo before ordering. You can also add words to your photo if you want to personalize your block even more.
The photo is printed on fabric and prepared so that you can cut and piece it just like you would other fabric in your quilt.
And then came the really fun part—the quilting!
I love seeing what happens when a quilter looks at a photograph and starts seeing quilting designs inside it.
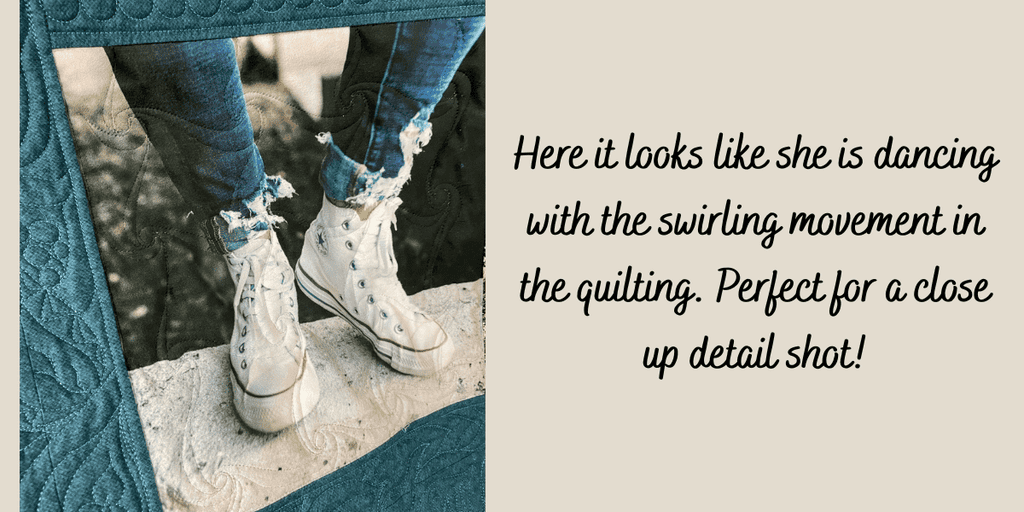
The quilting doesn’t have to stay inside the boundaries of the photograph. It can interact with the image, follow the background, highlight the subject, or even become part of the picture itself.
That is exactly what happened with this quilt.
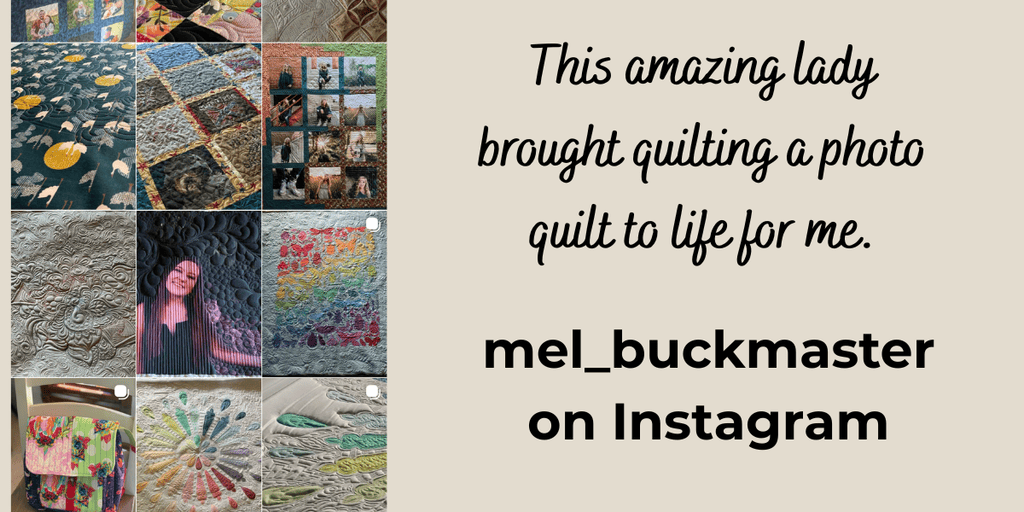
The Quilting – by Mendy Buckmaster
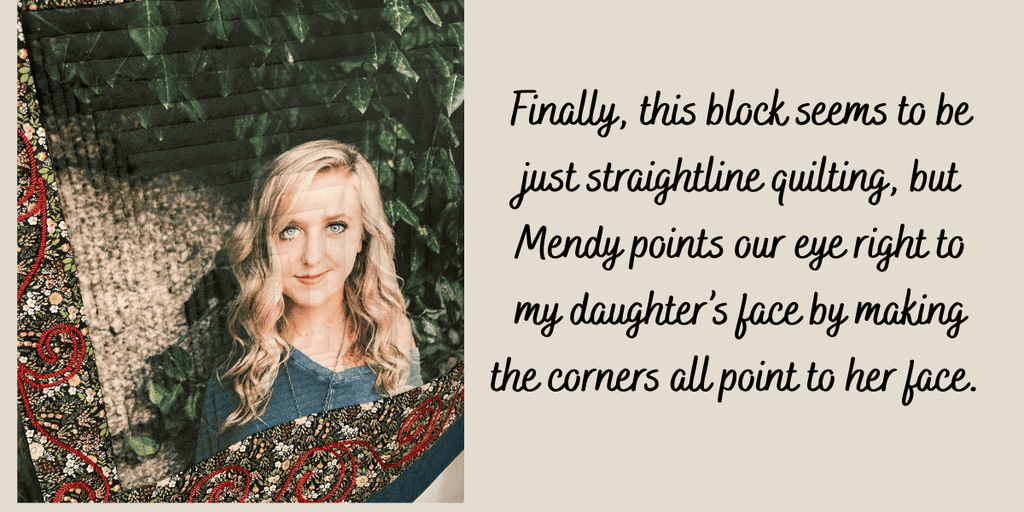
I knew I didn’t just want edge to edge quilting on this beautiful quilt. The quilt design was very simple, so that gave way to let the quilting shine and to add details to make the quilt stand out!
I turned my quilt over to a very talented lady, and told her I wanted to see what she saw when she looked at the quilt. OH MY! Was I amazed when I got it back!
The Little Details Make all the Difference
What You Could Do With This Design
This particular quilt was designed as a senior quilt for my daughter, but the idea certainly doesn’t have to stop there!
The cascading photo layout would be beautiful for so many types of memory quilts.
Imagine using it for:
- A senior graduation quilt
- A wedding or anniversary quilt
- A family memory quilt
- A grandchildren quilt
- A milestone birthday quilt
- A travel or vacation quilt
- A memorial quilt
- A military service quilt
- A quilt celebrating a special hobby, sport or activity
You could use the same basic idea with photographs from completely different stages of someone’s life.
And you don’t have to copy my fabric choices or use the exact same number of photos. You can change the colors, the size of the photo blocks, the number of photographs and even the overall size of the quilt.
The photos are what make the quilt yours.
In fact, that’s one of the reasons I love this design so much. The pattern is a starting point, but your photographs, fabric choices and quilting are what turn it into a one-of-a-kind memory quilt.
ORDERING THE PHOTO QUILT BLOCKS
Once I had my design figured out, I ordered my Photo Quilt Blocks based on the sizes I needed for the quilt.
This is where having the photographs printed specifically for the quilt makes the process so much easier.
You don’t have to worry about printing photographs at home, no struggling with a printer, trying to figure out how to get the the right size, all the things that slow you down. Our website is built just for this process.
Instead, you upload your photos to my website, it will snap them to the size you have chosen, add the seam allowances, and I print them on fabric for you. I even fuse sheerweight interfacing to the back so they are ready to cut and piece when they hit your door!
When you place your order, you select the block size you need and upload your photograph. The website helps you crop the photo to fit the block, and you can make adjustments before placing your order. You can also add words or journaling if you like!
I also add the appropriate seam allowance to the photo block, so you receive a fabric piece that is ready to use in your quilt project.
And remember—Photo Quilt Blocks is a printing service, not a finished quilt or a DIY photo-printing kit.
You do the quilting. I’ll take care of getting your photographs onto fabric.
That’s the whole idea behind Photo Quilt Blocks:
I print your photos on fabric for you, so you can do the fun part…QUILTING!
See This Quilt in Person
There is something about seeing a photo quilt in person that simply doesn’t come through in a photograph.
You can see the texture of the quilting, the way the thread interacts with the photographs, and all of the little details that make the quilt special.
And this quilt is a perfect example of that.
When you look closely, you’ll find quilting that follows fences, brick walls, stair rails, fields, clouds, trees and even the movement of the photographs. The quilting becomes part of the artwork.
That’s what makes this quilt so special to me. It isn’t simply a quilt with photographs on it.
The photographs, fabric and quilting all work together to tell my daughter’s story.
If you see me at a quilt show, come find me and ask to see the senior quilt! I’d love to show you the details and talk with you about how you could create your own photo quilt.
And if you’re not able to see it in person, keep following along—I have lots more photo quilts to share!
Happy Stitching!
Lori
Recent Posts
Wedding Signature Quilt & Graduation Memory Quilt | Customer Quilt Spotlight
Two Quilts, Two Stories: Turning Memories Into Quilts Some of my favorite quilts are the ones that tell a story. Not just through the fabric and pattern, but through the photographs,...
I love going to quilt shows. I love the quilts, the creativity, the inspiration—but most of all, I love meeting people who love creating as much as I do. I love talking with quilters about the...