
If you’ve ever sat down with your photos and thought,
“Okay… but how do I actually arrange these into a quilt?” — you are NOT alone.
The layout is what takes your photo quilt from “just a bunch of pictures” to a stunning, meaningful memory project.
The good news? You don’t need to be a designer. These tried-and-true layout styles make it easy to create a quilt that looks polished, balanced, and beautiful.
Let’s dive into 6 photo quilt layouts you can confidently use (and love 💕).

Designing a beautiful photo quilt layout doesn’t have to feel overwhelming—in fact, with the right approach, creating a stunning memory quilt can be simple, fun, and incredibly meaningful. Whether you’re working with a collection of family pictures, vacation snapshots, or special milestone moments, choosing the right photo quilt design is the key to turning your images into a cohesive and eye-catching quilt. Popular options like the classic grid, focus photo layout, and scrapbook-inspired shelf design make it easy for beginners and experienced quilters alike to create polished, professional-looking results. From DIY photo quilts and mini quilt projects to large photo memory quilts, these layout ideas help you organize your photos, balance colors, and tell a story through fabric. If you’ve been searching for photo quilt ideas, how to make a photo quilt, or inspiration for your next quilting project, these timeless layouts will help you confidently design a quilt that preserves your memories in a creative and lasting way.
1. Classic Grid Layout for Photo Quilts
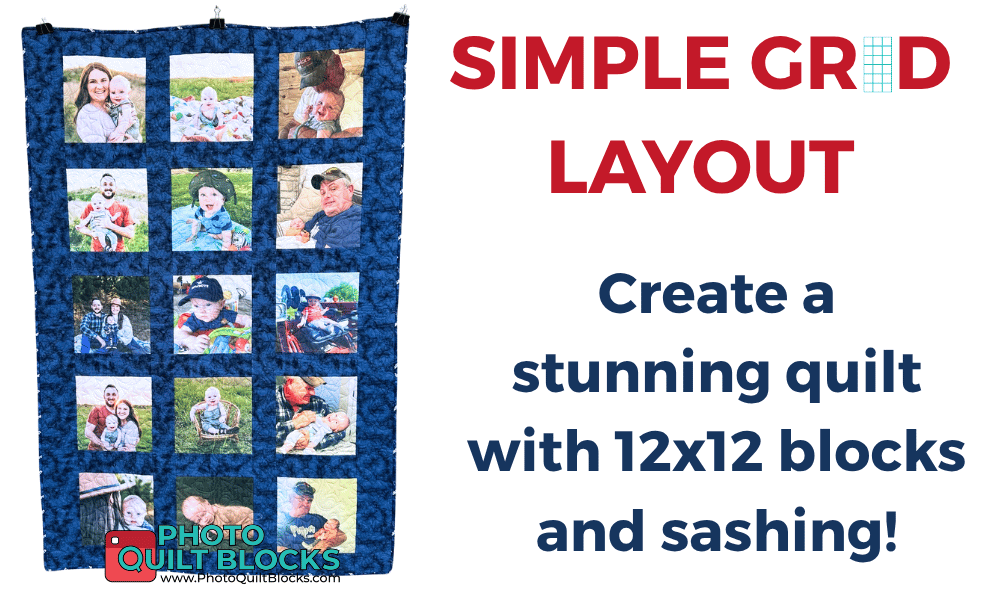
The classic grid layout is the go-to choice for beginners—and for good reason.
This timeless photo quilt layout is clean, organized, and incredibly easy to sew, making it perfect for anyone learning how to make a photo quilt or working on their first memory quilt project. By arranging your photo quilt blocks in evenly spaced rows and columns, you create a balanced, professional-looking design that lets each image shine without feeling cluttered.
This layout is especially ideal when you have a large collection of photos to include, whether you’re creating a family memory quilt, showcasing vacation photos, or designing a yearly recap quilt filled with special moments.
Because of its simple structure, the grid layout also makes cutting, piecing, and assembling your quilt top much more manageable—perfect for both beginner quilters and experienced makers who want a reliable, beautiful result. This is most visually appealing when you add a simple 2 inch sashing between the blocks. This extra fabric creates “breathing room” around your images, helping your photos stand out while enhancing the overall design of your DIY photo quilt.
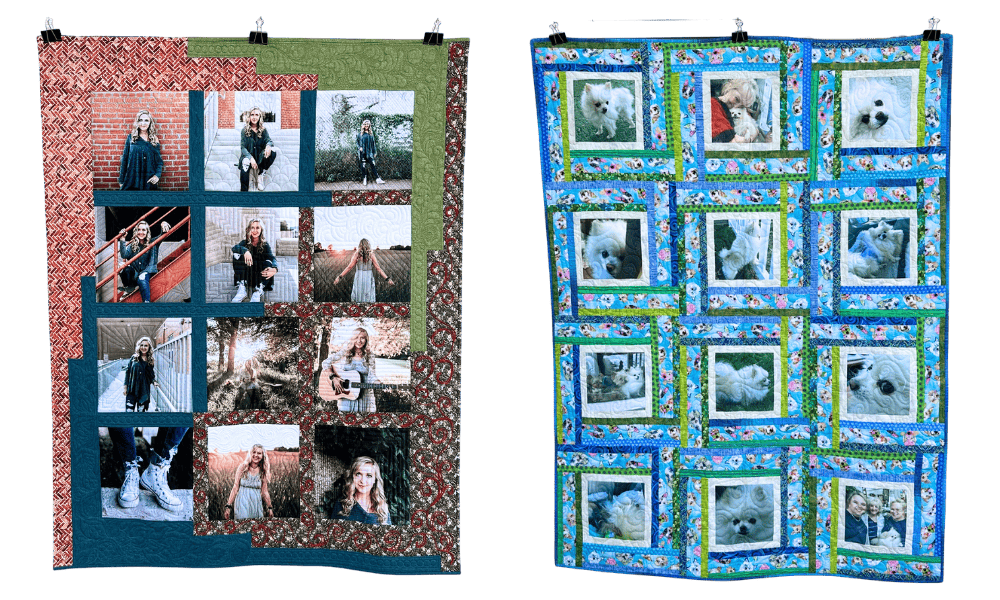
Add interest and get a little fancier with your borders and sashing!
In this quilt on the left, we have a senior photo quilt that the blocks are printed on a luxury velour fabric. The sashing around the 12 inch blocks follow the theme of the photos in the quilt. You can find the pattern for this quilt here: Cascading Border Quilt by Lori McCroskey.
The quilt on the left is a beautiful example of “puppy love” quilt. Pooh Bear came to Carol in a very unhealthy state as seen in the top left photo. As she loved Pooh back to health, he became a very loving beautiful friend and companion. He rides along with Carol and comes to her local sewing shop with her and sits by her side as she stitches and learns new machine embroidery tips and tricks. He is a precious boy!
In her quilt, Carol used a Log Cabin setting around her 8×8 photos to create a frame for all of little Pooh’s photos. After framing them all with bright happy colors, making sure the inner frame was white to highlight Pooh’s fur, she laid them out in a grid pattern and sewed them together to make a very bright and happy quilt to celebrate the mother son relationship they now have.
2. Large Center Focused Photo for Photo Quilts
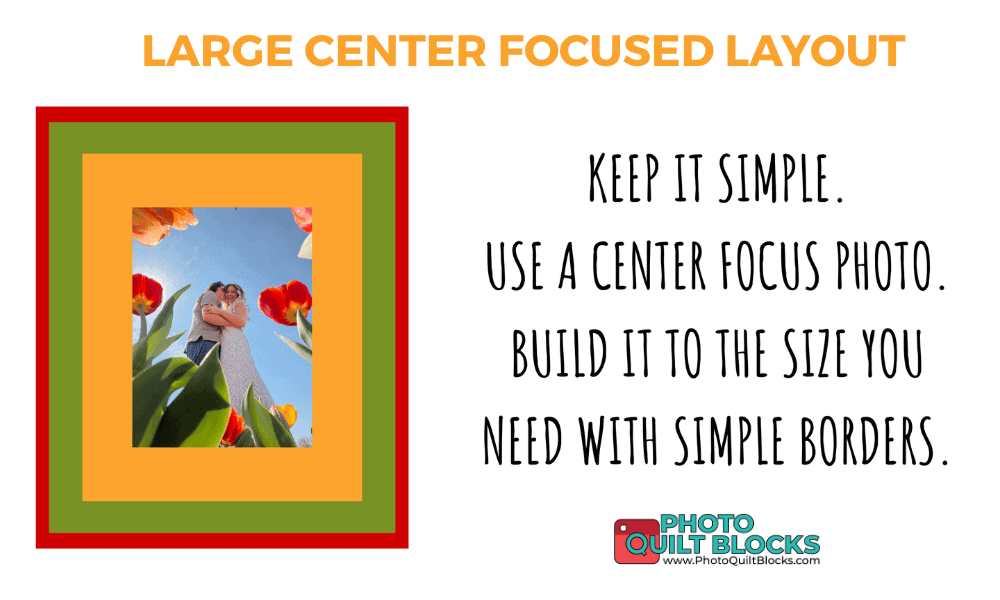
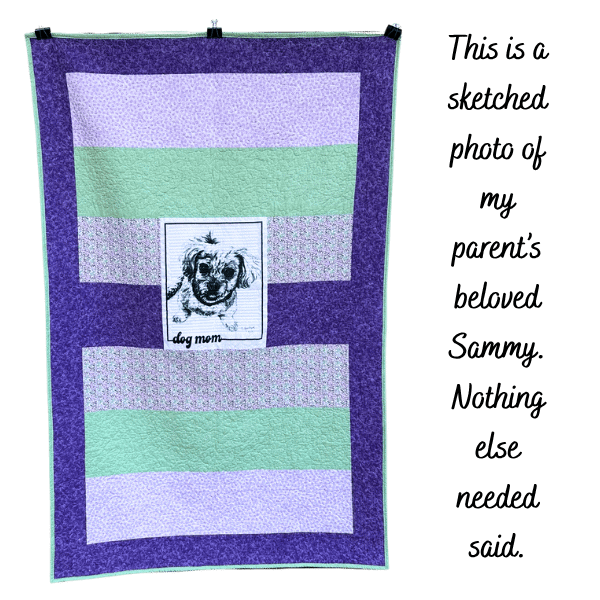
When you want your photo quilt to truly stop people in their tracks, the focus photo layout is pure magic. This design lets one special image take center stage—turning your quilt into a powerful memory quilt that instantly tells a story. Whether it’s a cherished wedding portrait, a beloved baby photo, or a meaningful tribute image, this layout transforms your project from a collection of pictures into a stunning, emotional keepsake. If you’ve been searching for photo quilt ideas that feel both simple and impactful, this is one of the most beautiful and beginner-friendly ways to create a quilt that feels deeply personal.
What makes this photo quilt layout so effective is its strong emotional pull and natural focal point. Your eye is immediately drawn to the main image, creating a clear visual story that feels intentional and polished. With only one photo, this layout also allows you to focus on accents and special quilting to turn your quilt into a simplistic masterpiece.
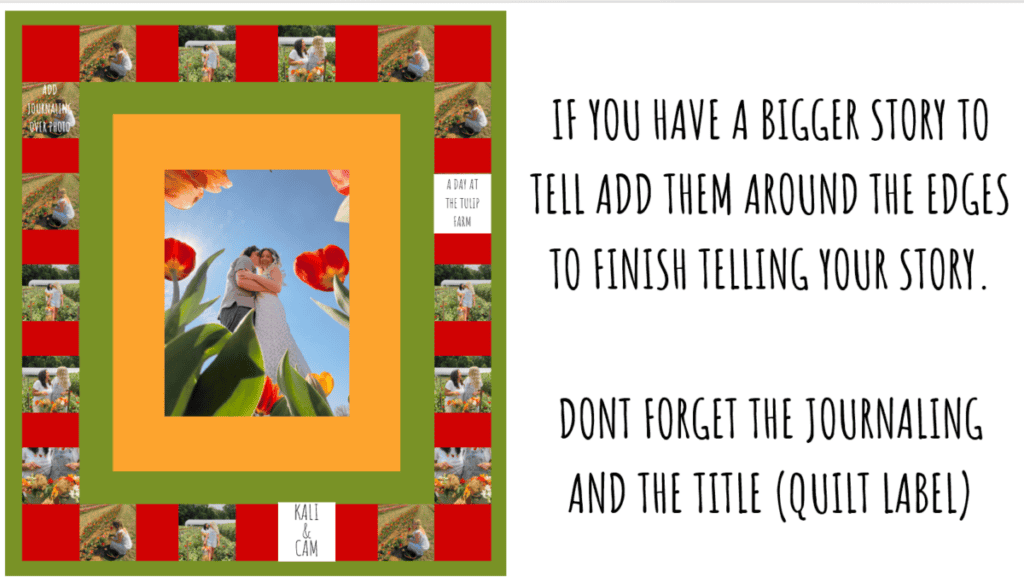
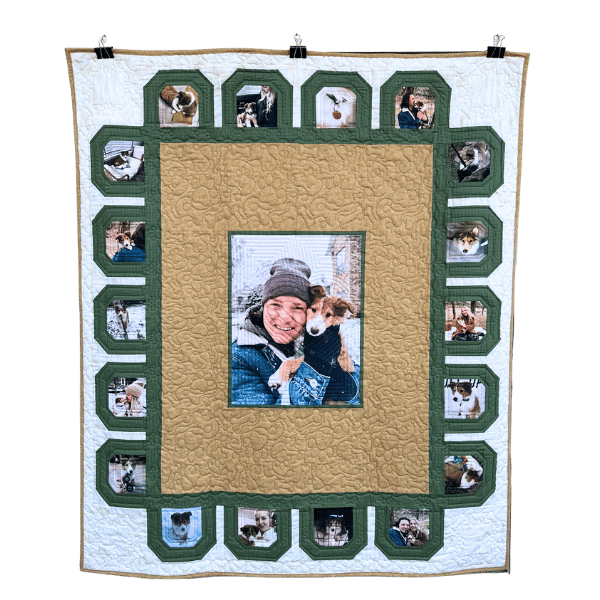
This is especially powerful for memorial quilts, where a single photo can honor a loved one, or for wedding quilts and baby quilts, where one moment captures everything you want to remember. The surrounding design supports—not competes with—the main photo, making this a perfect choice for DIY photo quilts that are meant to be displayed, gifted, or treasured for years.
For the most beautiful results, build your quilt around that central image using coordinating fabrics or smaller supporting photo quilt blocks. Choose colors pulled directly from the photo to create harmony, or add a few accent images that enhance the story without overwhelming it. This approach keeps your photo memory quilt balanced, meaningful, and visually stunning—proving that sometimes, less really is more when it comes to designing a quilt that captures the heart.
This is a sketched photo of my parent’s beloved Sammy. Nothing else needed said. They were very sad when he passed suddenly, and this memorial quilt was a simple way of trying to comfort them in their time of grief. My dad still sleeps with his to this day.

The next quilt is my favorite photo of my son-in-law with his new puppy, Bentley. Surrounding the center focused photo are supporting photos of little Bentley with his mom and dad as he is growing up. The back is a camo fleece with little paw prints in the pattern. In this pattern, I left a large border around the photo to accent and allow for special quilting. So precious!
You can find this pattern here: Scalloped Memories Photo Quilt Pattern
3. Repeated Block Layout for Photo Quilts
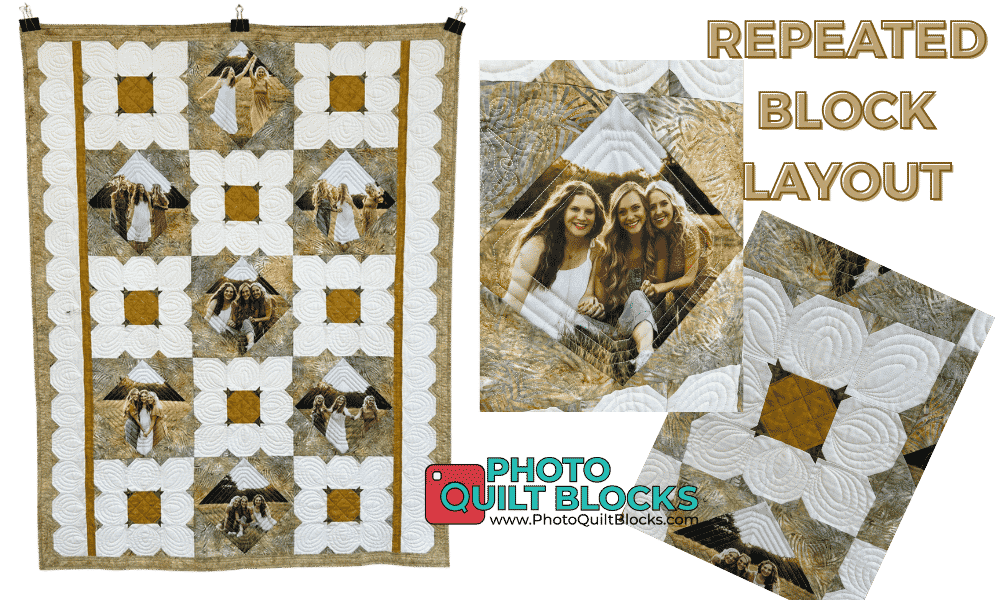
If you love a quilt that feels balanced, cohesive, and effortlessly beautiful, the repeating block layout is a must-try for your next photo quilt project. This classic design alternates photo quilt blocks with coordinating fabric blocks to create a rhythmic, eye-pleasing pattern that instantly looks polished and professional. It’s one of the easiest ways to turn your favorite images into a stunning memory quilt without overwhelming the design. If you’ve been searching for photo quilt ideas that feel organized but still creative, this layout hits that sweet spot perfectly.
You can get the pattern for the above quilt here: Blooming Blocks Quilt Pattern
What makes the repeating block photo quilt layout so effective is its built-in structure. By spacing out your photos with pieced blocks, you give each image room to shine while keeping the overall quilt soft, balanced, and visually calm. This is especially helpful when working with bold or colorful photos, as the alternating pattern prevents the quilt from feeling too busy. It’s a fantastic option for DIY photo quilts, especially if you don’t have a large number of images or want to highlight a smaller selection of meaningful moments.
This layout is perfect for family memory quilts, baby quilts, or even mini photo quilt projects where you want a clean, coordinated look. To take it to the next level, choose fabrics that pull colors directly from your photos—this creates a seamless, designer-quality finish that ties everything together. Whether you’re a beginner learning how to make a photo quilt or an experienced quilter looking for a reliable, beautiful layout, the repeating block design is a timeless favorite that always delivers.
In the below quilt, the bold chevrons form a shelf to hold the rows of photos, making them blend into the pattern and not seem chaotic. It really gives a rhythm and flow to this quilt that has so many photos!
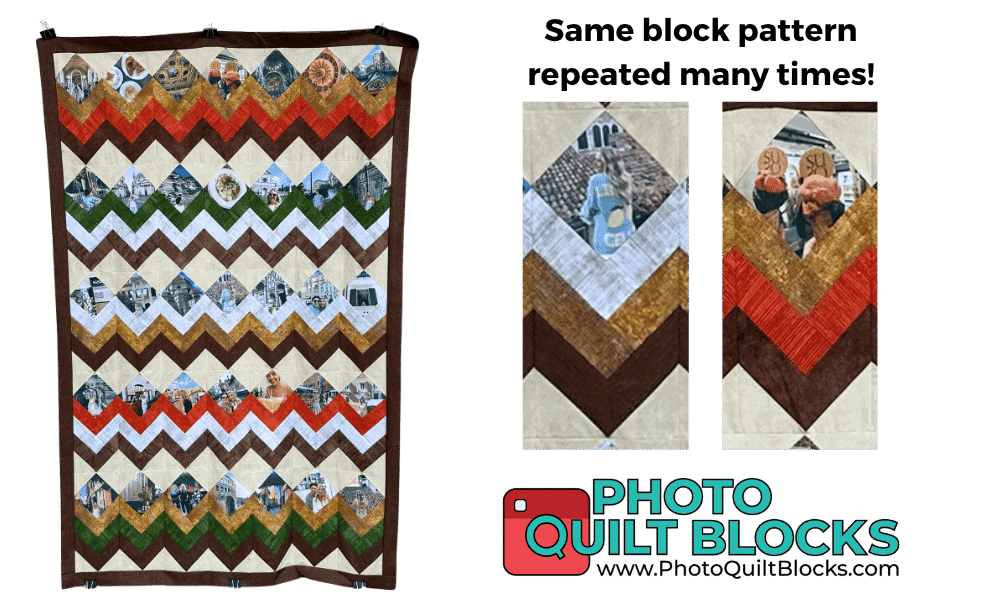
This pattern is coming soon!
4. Shelf Layout for Photo Quilts
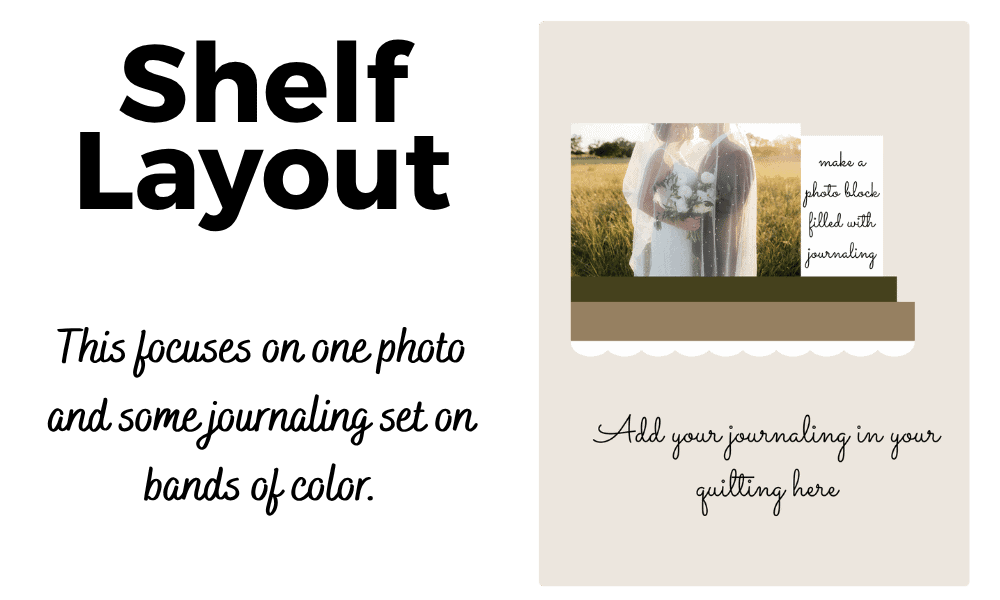
If you want your photo quilt to feel like a story unfolding across fabric, the shelf layout is a beautiful, scrapbook-inspired design that brings your memories to life. This creative photo quilt layout arranges your photo quilt blocks or block in a horizontal row—like photos sitting on a shelf—making it perfect for organizing moments in a way that feels natural, flowing, and deeply personal. Whether you’re working on a family memory quilt, a baby’s first year, or a travel-themed project, this layout helps organize your photos in a line of symmetry that keeps your eyes focused on the main thing, the photos.
One of the reasons the shelf layout photo quilt works so well is that it blends structure with creativity. The row keeps your quilt organized and easy to sew, while still giving you flexibility to vary photo sizes, mix in coordinating fabrics, or highlight different chapters of your story. The “shelf” gives you a creative line for journaling, for embroidery, for stitched journaling, for embellishing with keepsakes. This one is a perfect design for a small wall hanging over a bed or in smaller spaces. This makes it ideal for DIY photo quilts where you want both guidance and creative freedom. It also prevents your design from feeling too rigid—unlike a strict grid—while still maintaining a polished, professional look that quilters love.
For the best results when creating multiple “shelves”, group your photos by theme, color, or time period within each “shelf” to create a cohesive flow across your quilt. Pair your images with fabrics that complement your photos, and you’ll create a stunning photo memory quilt that feels warm, organized, and full of personality. If you’re looking for photo quilt ideas that tell a story and stand out on Pinterest, the shelf layout is a standout choice that’s both eye-catching and incredibly meaningful.
5. Band Layout for Photo Quilts
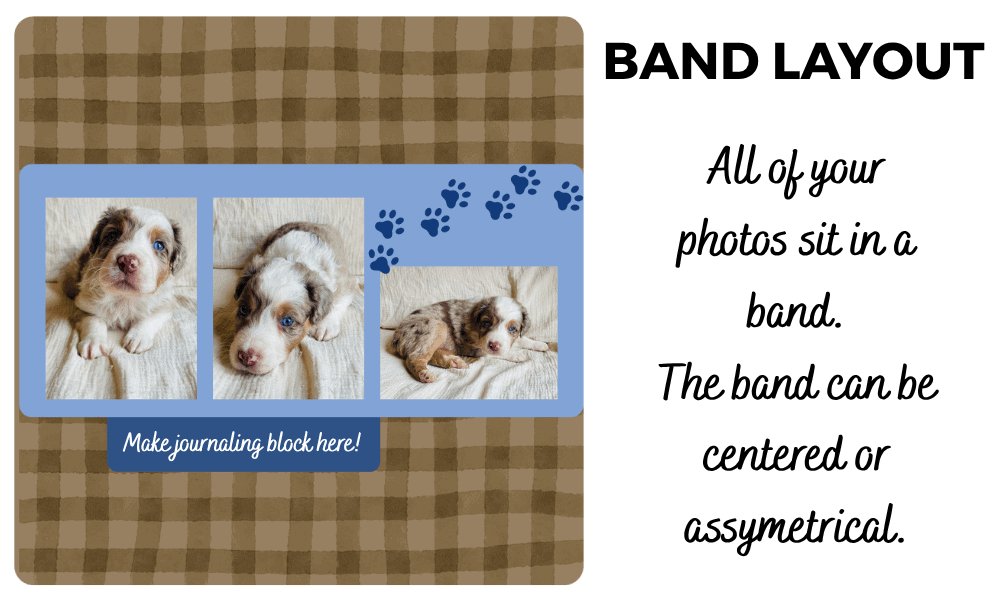
If you’re looking for a photo quilt layout that feels bold, modern, and incredibly eye-catching, the band layout is a standout choice. This design uses horizontal or vertical “bands” of photo quilt blocks mixed with fabric strips to create a striking, structured look that instantly draws the eye across the quilt. It’s a fresh take on the traditional memory quilt, giving you a clean way to organize photos while still making a big visual impact. If you’ve been searching for photo quilt ideas that feel unique but still easy to plan, the band layout is a perfect blend of simplicity and style.
If you choose to have multiple bands, what makes the band layout photo quilt so effective is its ability to guide the viewer’s eye through your story. Each band can represent a different theme, time period, or milestone—making it ideal for family memory quilts, graduation quilts, or even a baby’s first year. The alternating strips of fabric give your photos space to shine while adding contrast and movement to the design. This makes it especially helpful for DIY photo quilts, where you want to avoid a cluttered look but still include meaningful images.
For a polished finish, choose coordinating fabrics that pull colors from your photos and keep your band widths consistent for a cohesive design. You can go bold with high-contrast fabrics or keep it soft and timeless with neutrals—either way, the structure of this layout keeps everything looking intentional and balanced. Whether you’re a beginner learning how to make a photo quilt or an experienced quilter exploring new design ideas, the band layout offers a creative, story-driven approach that looks beautiful both on display and wrapped around someone you love.
6. Blocked Layout for Photo Quilts
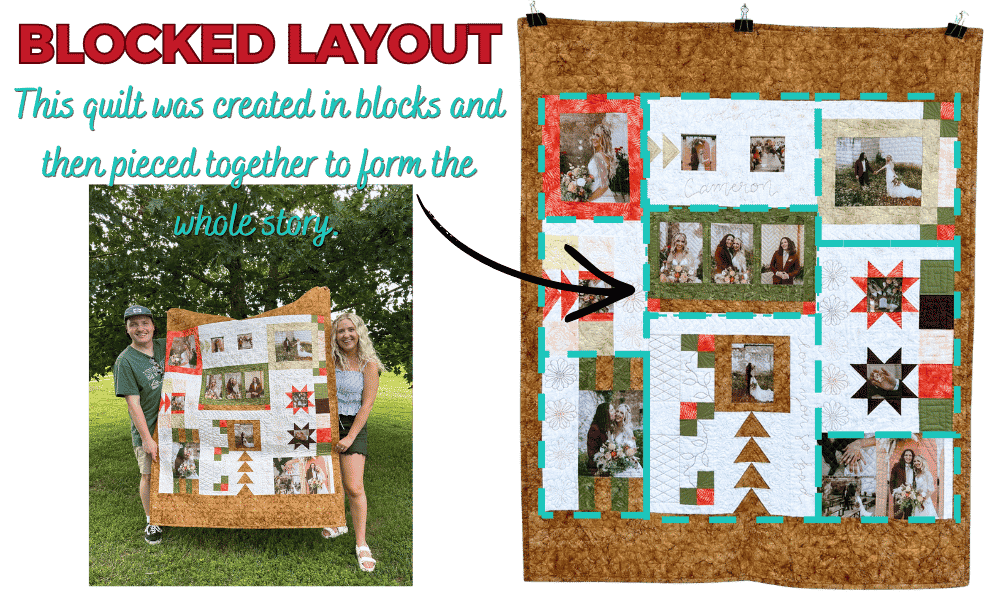
The blocked layout photo quilt is a stunning way to turn your memories into a beautifully organized, story-driven design—and this photo is a perfect example of how it all comes together. Instead of building your quilt row by row, this approach breaks your project into smaller sections or “blocks,” each with its own arrangement of photo quilt blocks, fabrics, and design elements. These sections are then pieced together like a puzzle to create one cohesive memory quilt. This method is especially popular for DIY photo quilts because it makes the design process feel more manageable while still allowing for incredible creativity and personalization.
What makes the blocked quilt layout so powerful is its ability to combine multiple styles into one quilt without feeling chaotic. Each block can tell its own mini story—highlighting different events, people, or themes—while still contributing to the overall look of the quilt. This makes it perfect for family memory quilts, wedding photo quilts, or larger photo memory projects where you want to include a variety of images and design elements. It also gives you flexibility to mix traditional quilt blocks with photos, creating a rich, layered design that feels both meaningful and visually interesting.
For the best results, keep a consistent color palette or fabric style flowing throughout all your sections to tie everything together. Even though each block is unique, repeating colors or fabrics helps your photo quilt design feel intentional and balanced. If you’ve been searching for photo quilt ideas that offer both structure and creative freedom, the blocked layout is a beautiful way to design a quilt that tells a full, detailed story—one section at a time.
No matter which layout you choose, your photo quilt is going to be something truly special—because it tells your story.
If you’re not sure where to start, try the Classic Grid or Focus Photo layout first—they’re the easiest and always turn out beautiful.
💬 I’d love to know—
Which layout are you most excited to try?
Recent Posts
2026 Quilt Show Schedule: Where to Find Photo Quilt Blocks at Quilt Shows This Year
Quilt show season is one of my favorite times of the year! There’s nothing quite like being surrounded by creative quilters, sewists, embroidery enthusiasts, and fabric lovers who all share a...
Best Photo Layout Ideas for Memory Quilts With Lots of Photos
Looking for the best photo layout ideas for memory quilts with lots of photos? Whether you’re creating a family memory quilt, pet memorial quilt, graduation quilt, or heritage photo quilt, the...