
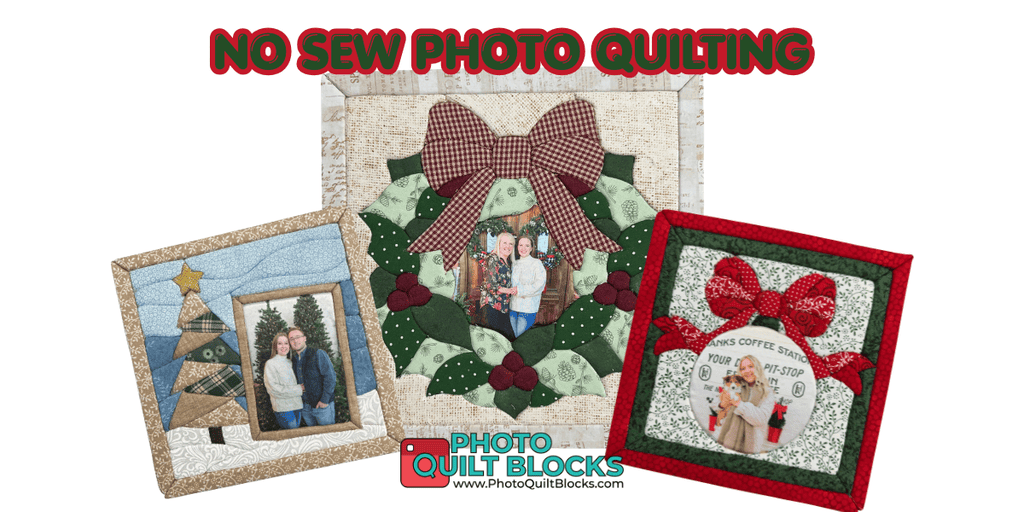
Have you ever wanted to make a beautiful fabric project but didn’t want to get out your sewing machine? Or maybe you love quilting but want to try something a little different?
Let me introduce you to No Sew Photo Quilting or Kinusaiga!
Kinusaiga is a Japanese fabric art technique that creates beautiful pictures and designs using small pieces of fabric. The best part? There is NO SEWING involved!
Instead of stitching fabric pieces together, you tuck the edges of the fabric into grooves cut into a foam board. The result is a colorful, textured fabric picture that looks almost like a miniature quilt.
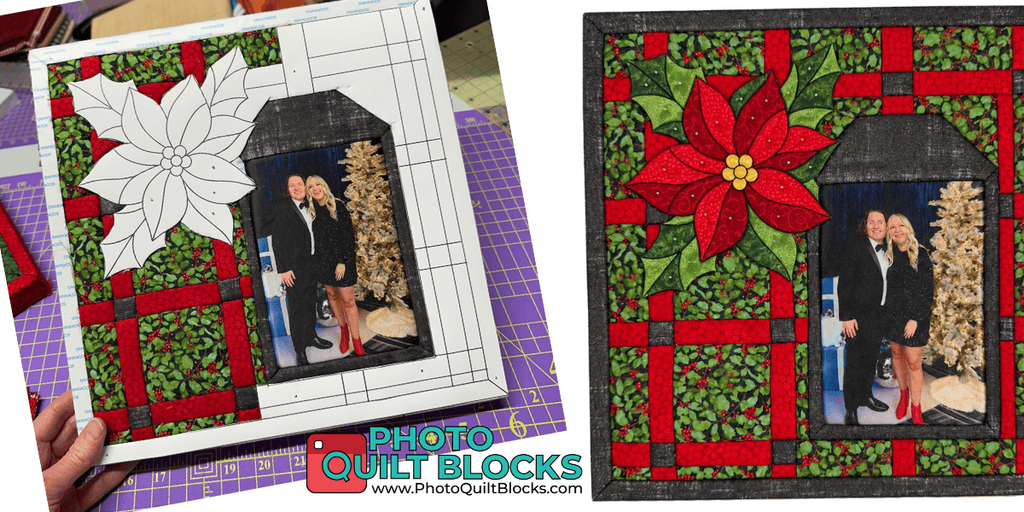
And here’s where things get really fun for photo lovers: You can incorporate printed photos into your Kinusaiga projects!
Imagine making a seasonal decoration with pictures of your grandchildren, a special pet portrait, or a beautiful memory keepsake. You can combine traditional quilting fabrics with your favorite photographs to create something truly personal.
Let’s get started!
Supplies You’ll Need
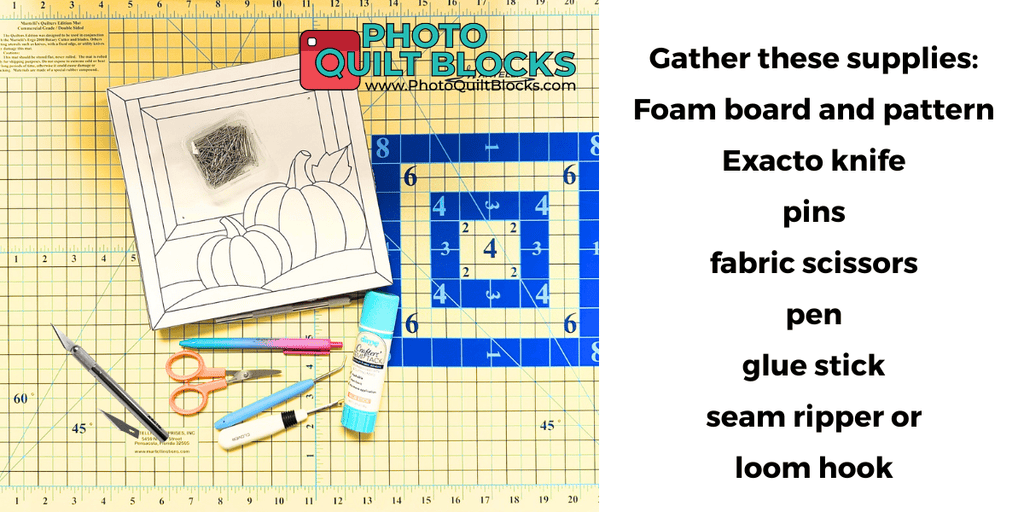
You don’t need a sewing machine or a lot of specialty equipment to get started.
Gather these supplies:
- Foam board
- No Sew Photo Quilting Pattern
- Double-sided adhesive for your foam board
- Small utility knife (Exacto Knife is what I use)
- Straight pins
- Fabric scissors
- Pen
- Glue stick
- Seam ripper or loom hook tool
- Assorted fabric pieces
If you are making a photo Kinusaiga project, you’ll also need your printed photo fabric.
A little tip: Choose fabrics with colors and patterns that complement one another. You can use scraps from your quilting stash, which makes this a great way to use up those little pieces you’ve been saving!
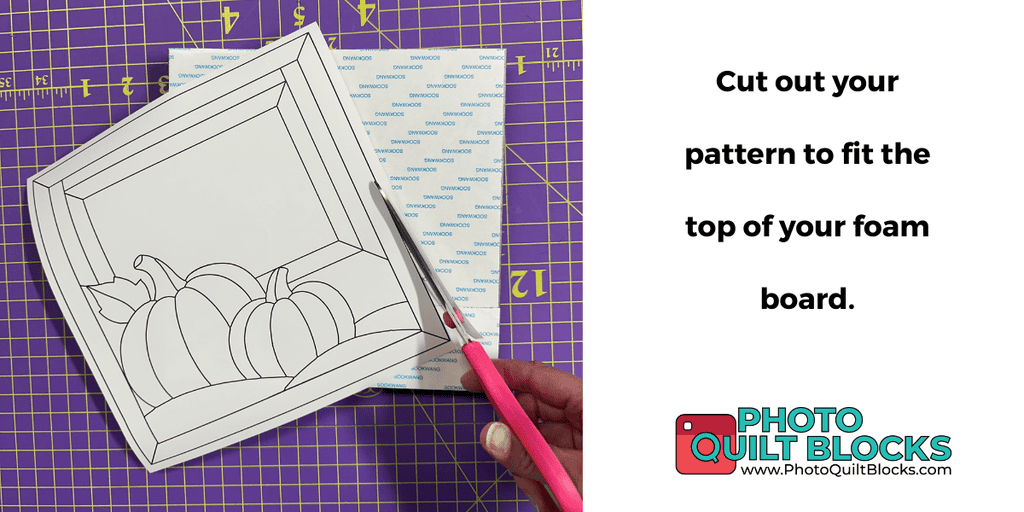
Step 1: Prepare Your Pattern and Foam Board
Start by cutting out your pattern and placing your No Sew Photo Quilt pattern on top of your foam board that has been prepared with double sided adhesive. DO NOT REMOVE THE PAPER ON THE ADHESIVE! You are going to put your paper pattern on top of this. You will use the adhesive to stick your fabric layer down to the board so it does not move around while you are tucking the fabric edges into the groove you will cut.
Your pattern should have all the individual sections outlined. Each section will eventually be filled with a different piece of fabric.
For this project, I am using a design with a picture frame and pumpkins. You can use seasonal designs, flowers, animals, landscapes, or even a design that includes a space for a photograph. We are building a collection of designs that can include your favorite memories in photos printed on fabric!
Once your pattern is positioned, you are ready to secure it.
Step 2: Pin Your Pattern in Place
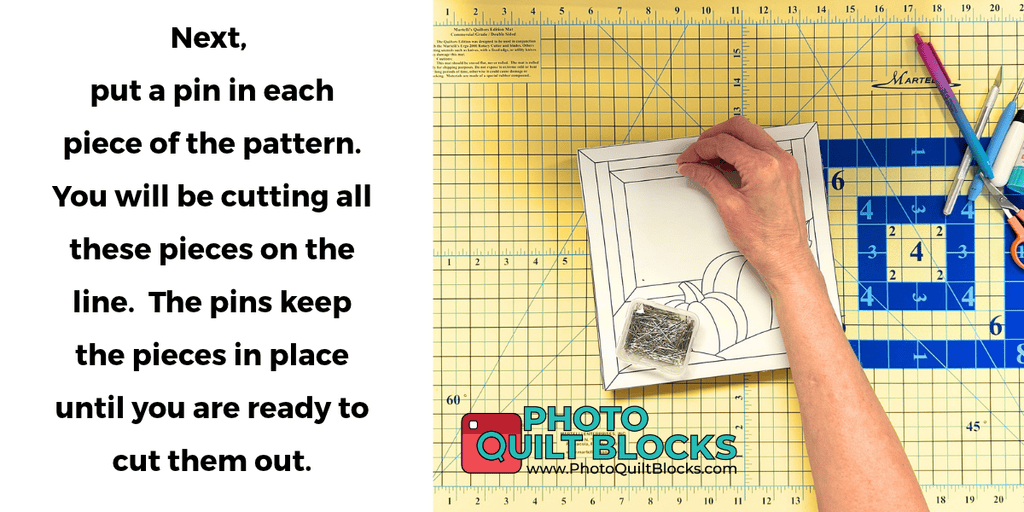
Put a pin in each section of your pattern.
You will be cutting along all the lines, so the pins help keep the paper pattern from shifting while you work.
Make sure your pattern is laying flat against the foam board. You want all those lines to stay exactly where they belong!
Step 3: Cut Along the Pattern Lines
Now comes the fun part!
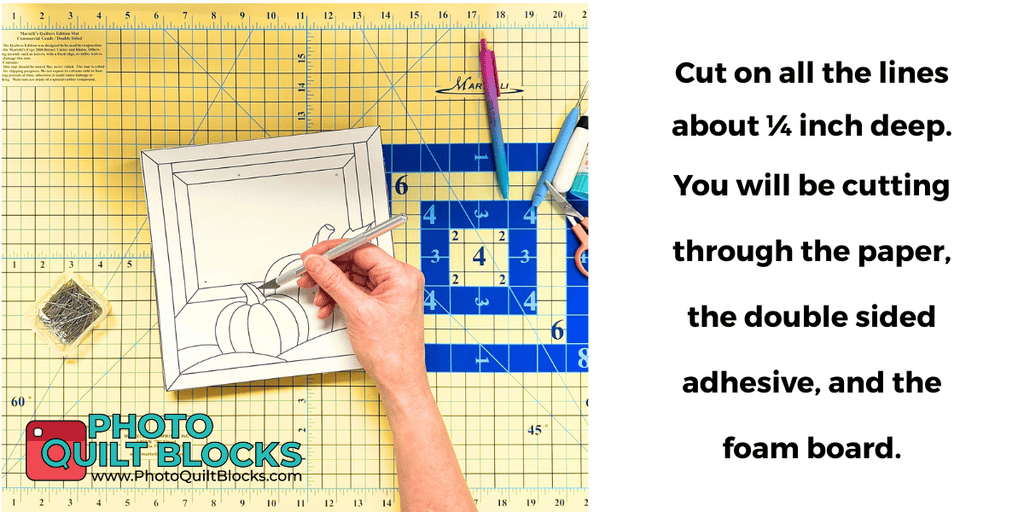
Using your knife, carefully cut along all the pattern lines.
You want to cut approximately 1/4 inch deep into the foam board.
You will be cutting through the paper pattern, the double-sided adhesive, and into the foam board itself.
These little cuts create the grooves that will hold your fabric in place.
Important: Take your time with this step. You want your lines to be clean and accurate because they will determine where each piece of fabric fits.
Step 4: Remove the First Pattern Piece
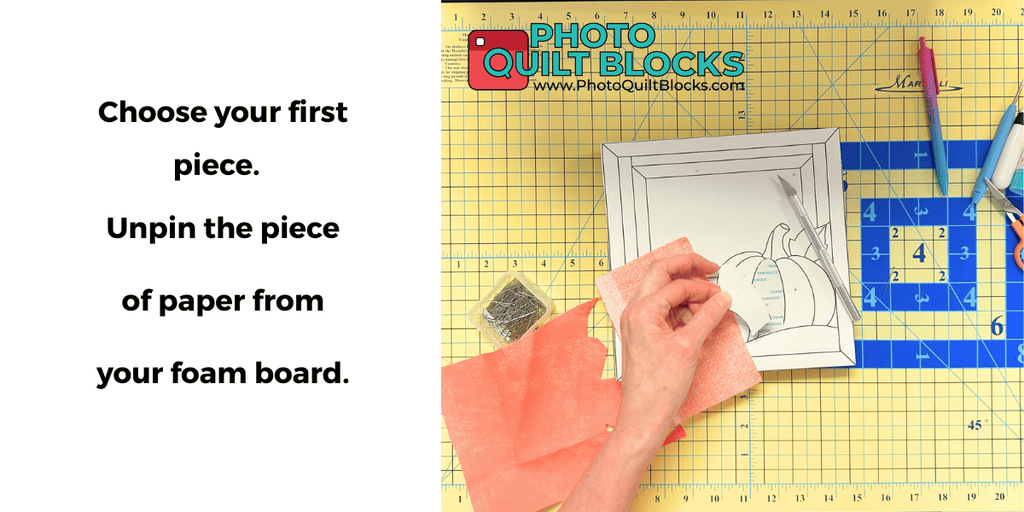
Choose the first section of your design.
Carefully remove the pin and lift that piece of paper away from the foam board.
You will use this paper piece as your template for cutting the fabric.
I like to work on one section at a time so I don’t get my pieces mixed up.
Step 5: Glue the Paper Template to Your Fabric
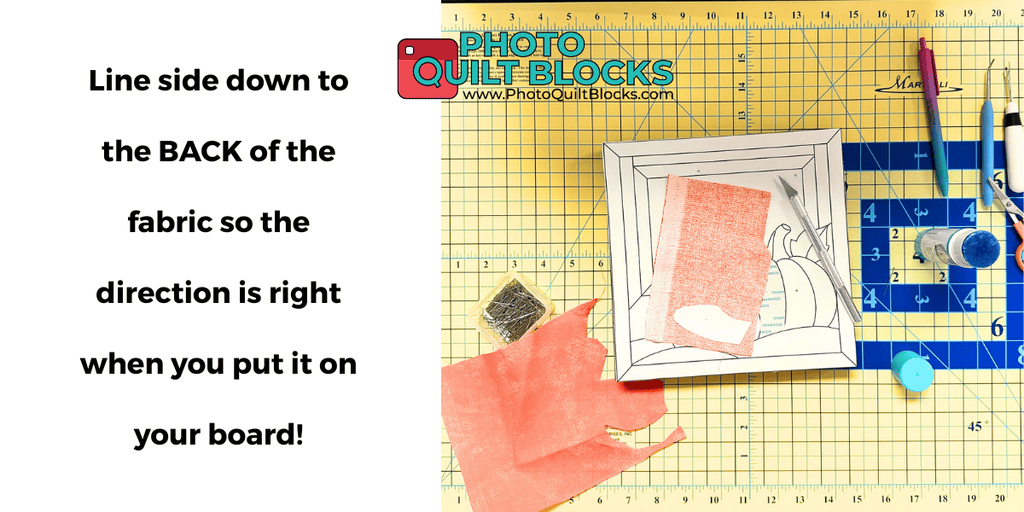
This is an important step, especially if your fabric has a directional print!
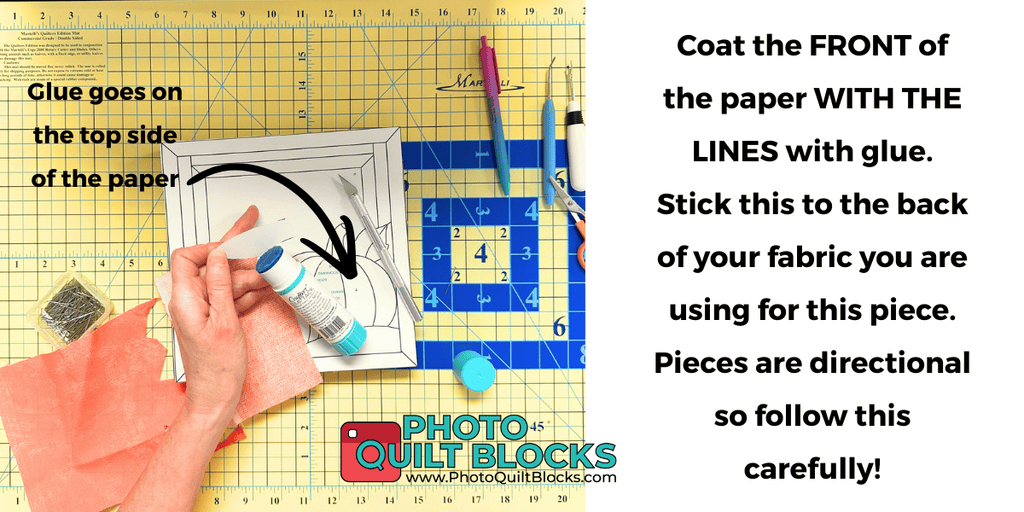
Apply glue to the FRONT of the paper template (the side with the printed lines).
Place the glued side of the paper onto the BACK of the fabric you want to use.
You are essentially using the paper template to position and cut your fabric.
Pay attention to direction! If you cut it the wrong direction, it won’t line up with your cut lines.
Step 6: Check Your Fabric Direction
Before cutting, double-check that your pattern piece is positioned correctly.
Remember, you are placing the paper with the lines facing down against the BACK of the fabric.
When you turn the fabric over and put it on your Kinusaiga board, the design should be facing the direction you intended.
This little check can save you from having to recut a piece to fit in your space!
Step 7: Cut Out Your Fabric Piece
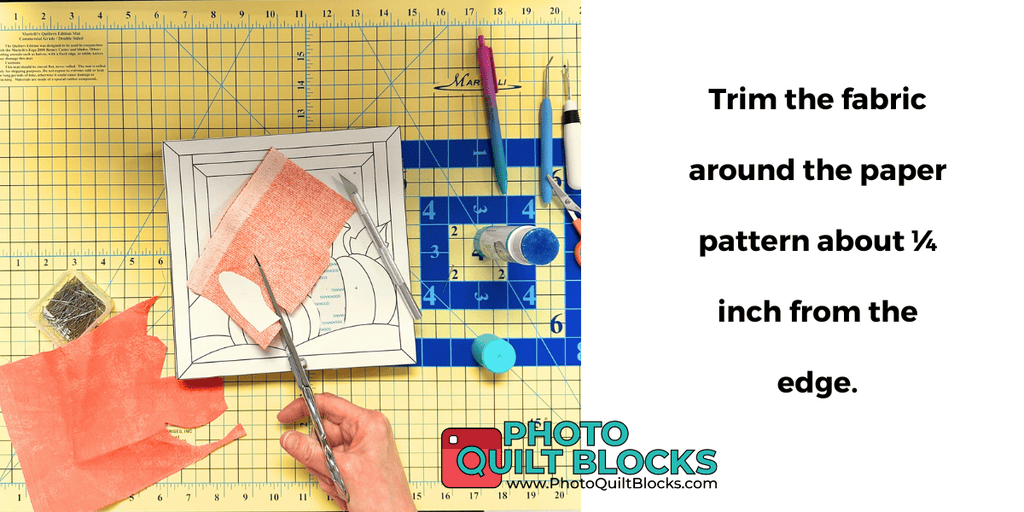
Using your fabric scissors, cut around the paper template.
Leave approximately 1/4 inch of extra fabric around the outside of the paper pattern.
This extra fabric is important because you will need enough material to tuck down into the grooves in the foam board.
Don’t worry about making the edges perfectly straight. The extra fabric will be tucked out of sight!
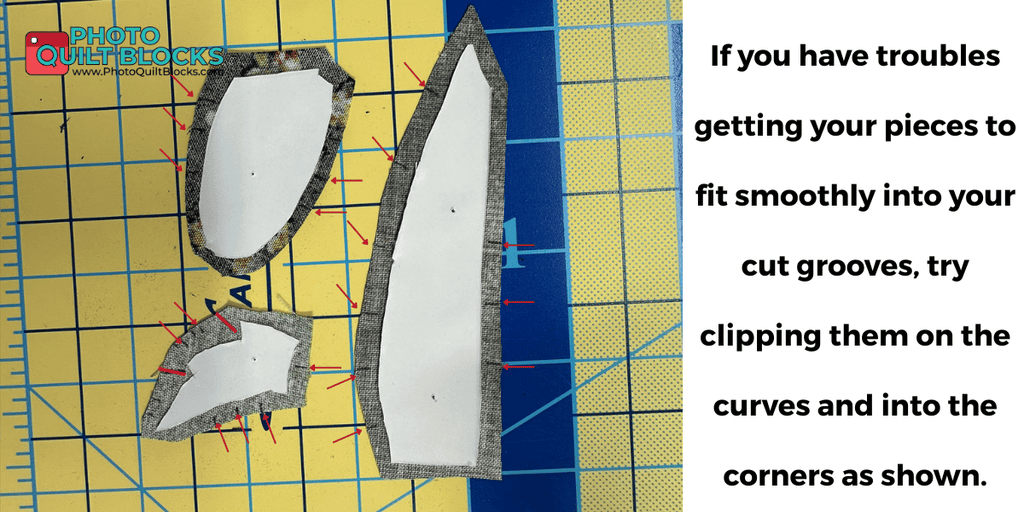
Slightly clip curves and snip into corners so the fabric goes in your tight places easily. I will have more on that in a little bit!
Step 8: Position Your Fabric on the Board
Now you are ready to add your fabric!
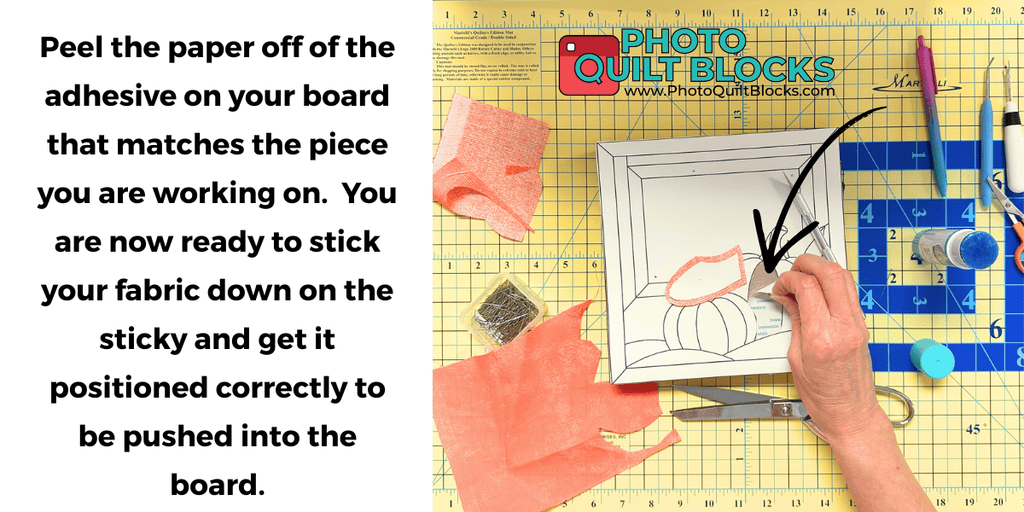
Find the matching section on your foam board and peel away the protective paper covering the double-sided adhesive for that section.
Position your fabric over the sticky area.
Take a moment to make sure it is lined up correctly before you start tucking the edges.
Once you are happy with the placement, gently press the fabric into position.
Step 9: Tuck the Fabric Into the Grooves
Here’s where the magic happens!
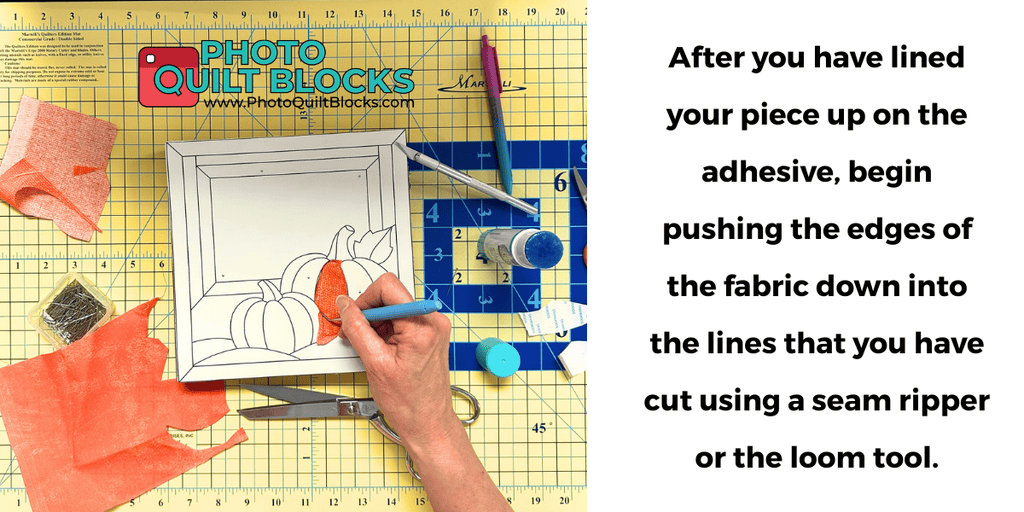
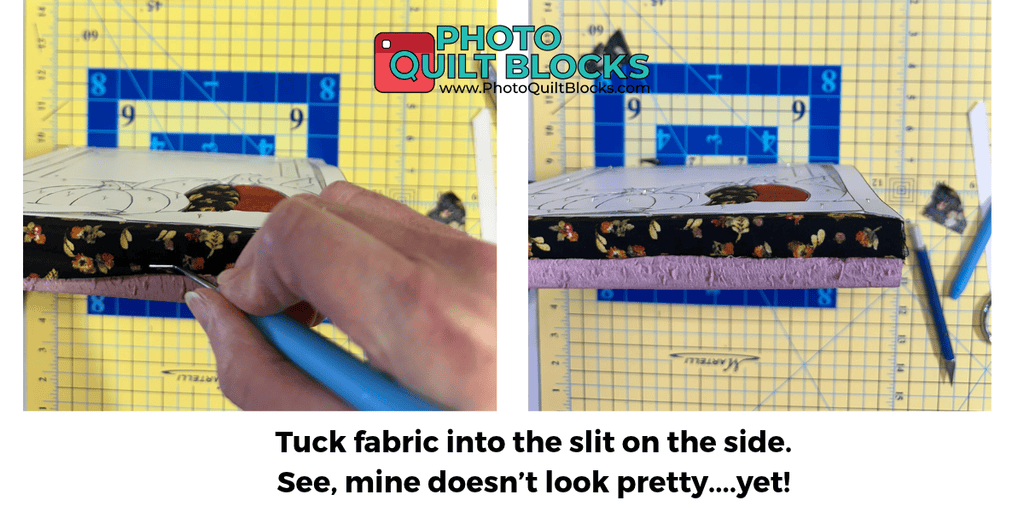
Using your seam ripper or loom hook tool, gently push the extra fabric edges down into the grooves you cut earlier.
Work slowly around the entire piece, pushing the fabric into the foam until the edges are tucked neatly out of sight.
You should begin to see the individual sections of your design take shape!
For curves and corners, you may need to make small clips in the extra fabric to help it fit smoothly. Be careful not to cut too close to the groove.
Tips for Curves and Corners
Some designs are easier than others, especially when you are first learning Kinusaiga.
Here are a few things that will help:
- Work with small sections: Don’t try to complete too much at once.
- Use small fabric pieces: Smaller pieces are easier to maneuver around curves.
- Clip curves carefully: Small clips in the extra fabric help it lay smoothly.
- Take your time with corners: Work one edge at a time to get a neat finish.
- Use your tools gently: You want to tuck the fabric into the foam, not tear through it.
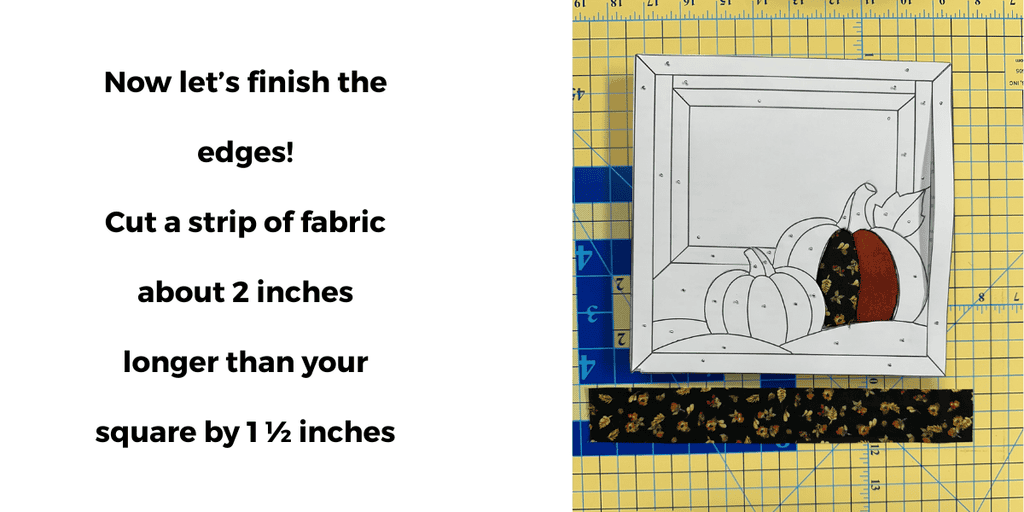
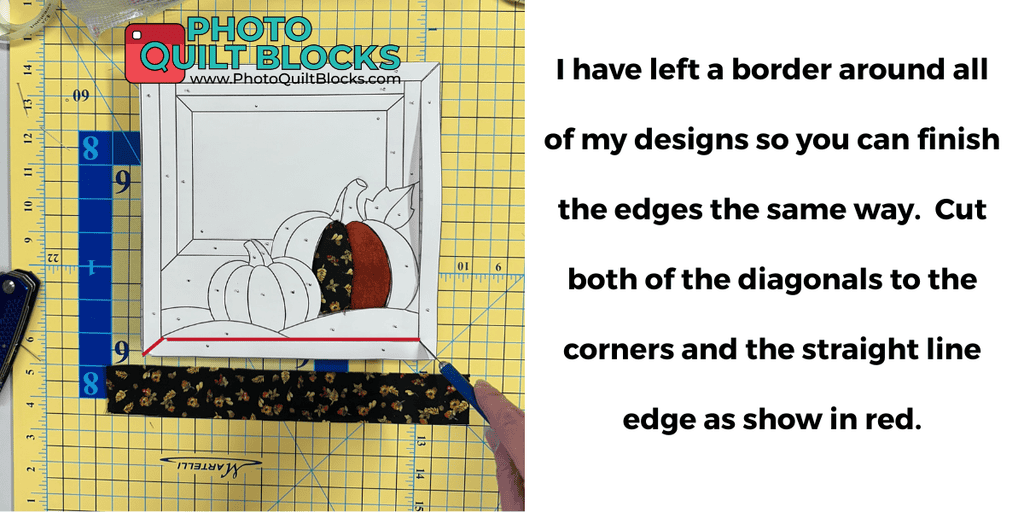
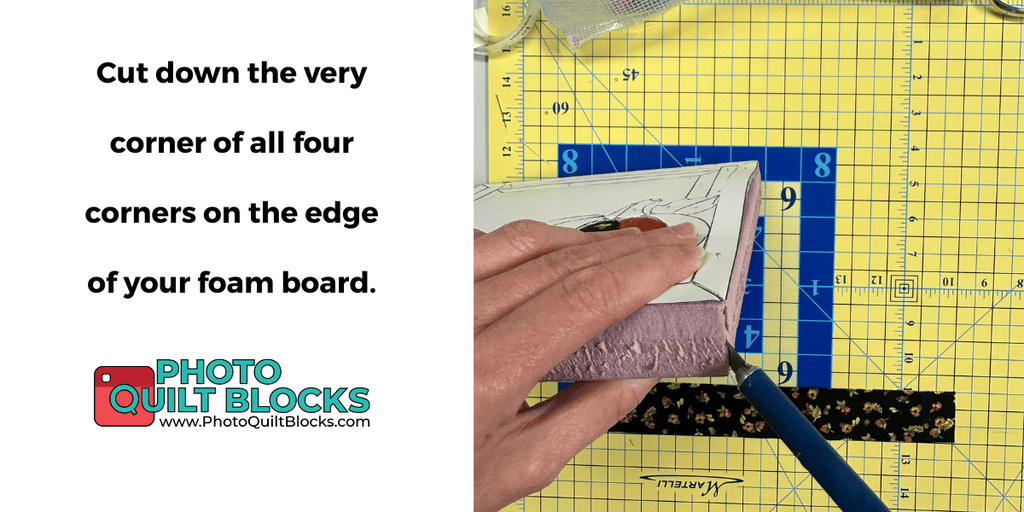
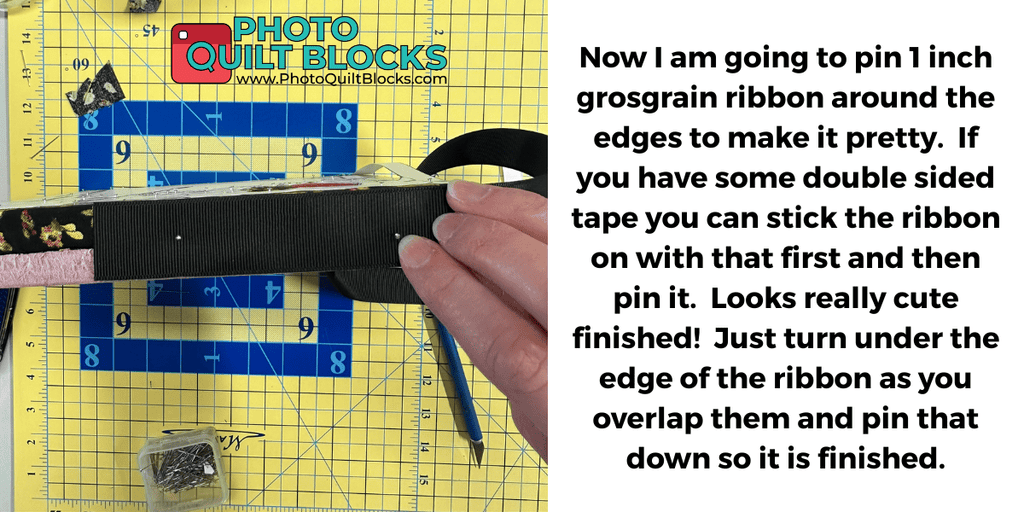
Step 9: Finishing the Edges of your board
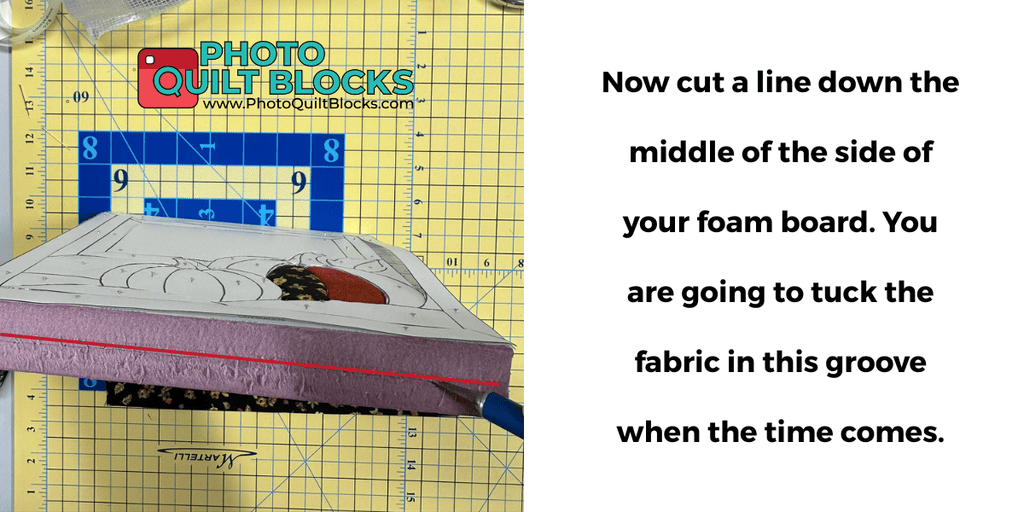
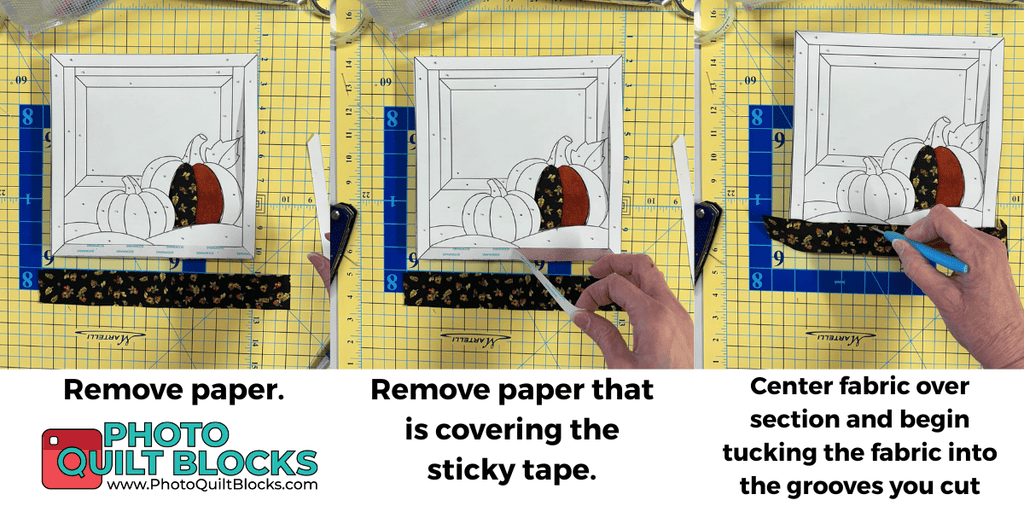
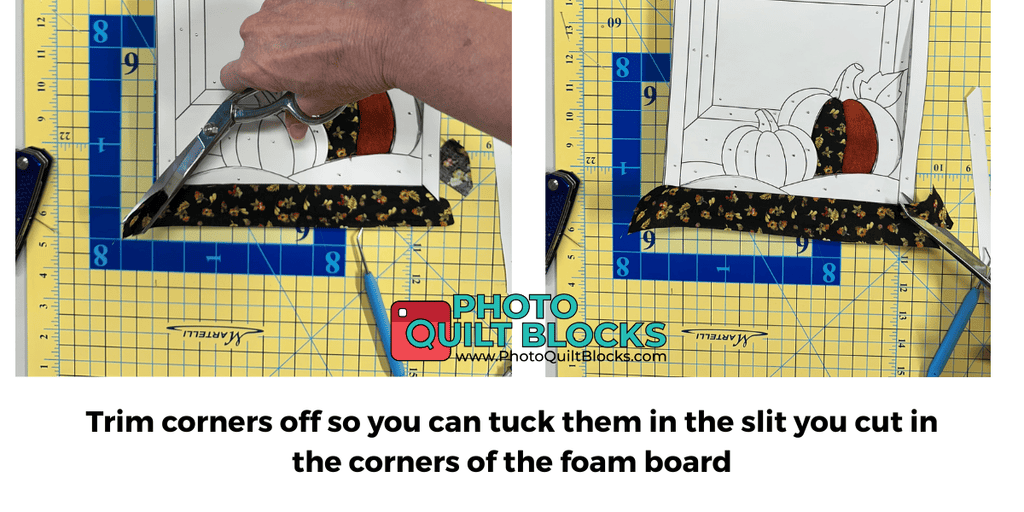
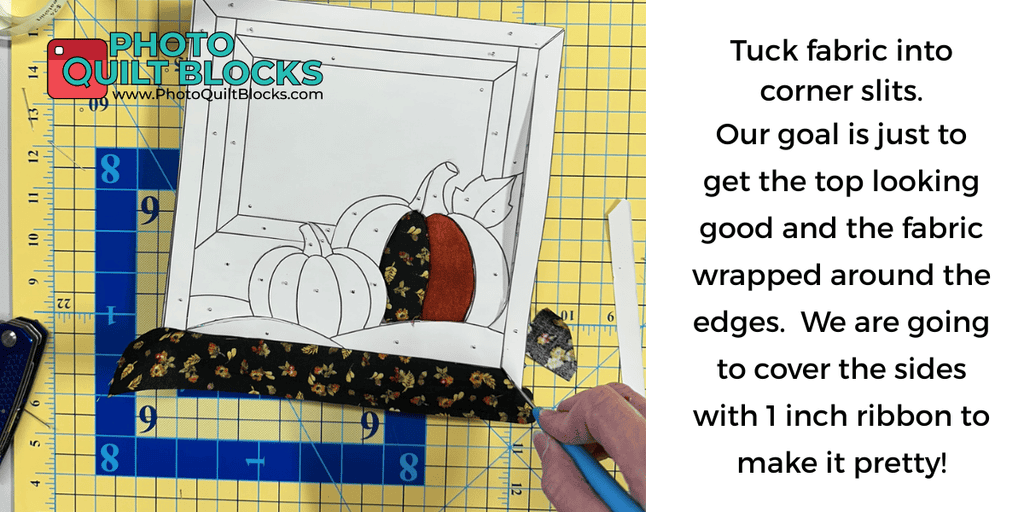
How to Add Photos to Your Kinusaiga Project
Now let’s talk about my favorite part: adding photographs!
You don’t have to limit your Kinusaiga projects to traditional quilting fabrics. You can incorporate printed photos to turn your fabric artwork into a personalized keepsake.
Here are a few ideas:
- Grandchildren: Add a photo of the kids to a seasonal design.
- Pets: Create a special portrait of your favorite furry friend.
- Family memories: Combine family photos with coordinating fabrics.
- Wedding memories: Make a decorative piece featuring a favorite wedding photograph.
- Baby keepsakes: Use a baby’s picture in a nursery-themed design.
For the best results, plan your photo area when choosing or creating your pattern. A simple square or rectangular photo section is a great place to start.
Print your photograph on fabric, cut it to fit the designated section, and use the same process to position and tuck the fabric into your board.
At Photo Quilt Blocks, we make it easy to turn your favorite photographs into fabric. You can upload your pictures, crop them, add words, and order your printed photo fabric right from our website.
Your memories deserve to be part of something beautiful!
Ready to Try No Sew Photo Quilting (Kinusaiga)?
I hope this inspires you to try something new with your fabric stash!
Kinusaiga is a fun way to enjoy fabric art without sewing, and the possibilities are endless. Whether you make a seasonal decoration, a personalized gift, or a photo memory project, you can create something special one little piece of fabric at a time.
And remember, you don’t have to be an experienced quilter to enjoy this technique.
If you love fabric, enjoy being creative, and have a few photographs you’d love to turn into keepsakes, you’re ready to give it a try!
Want to add photos to your next project?
Visit Photo Quilt Blocks and let us print your favorite memories on fabric. You do the fun part…creating something beautiful!
Recent Posts
25th Wedding Anniversary Photo Quilt - Customer Quilt Spotlight
Some quilts tell a story. This one tells an entire adventure. ❤️ When Kathy contacted me about creating Photo Quilt Blocks for a very special quilt, we knew the photos had to be just...
My Daughter’s Senior Photo Quilt | Cascading Border Quilt Pattern
Meet the Picture Quilt - Cascading Borders Photo Quilt Pattern Some quilts are made to keep you warm. Some are made to decorate a room. And then there are the quilts that hold a...